Self-Tanners

*This post may contain affiliate links.

I’m not sure why, but I just feel a hundred times better when I have a nice bronze glow. There is just something about a nice tan that makes me happy. Maybe I feel like I’ve just been on vacation? I’m not sure… All I know is that I love a good tan and I’ve tried a few things to achieve it.

I wouldn’t consider myself a professional, because I’ve only used a couple that I’ve liked. Once I find something that works, I kind of just stick with it. Why risk a bad tan, when I know what I’m using is good?

I typically apply my tanner every week to 10 days. Depending on my schedule and what I’ve got going on. I do have some other products that I use in between tans to help stretch out the length of time in between as well!

Before I get into the products, I’ll go over some tips I’ve learned along the way. I’ve made some mistakes and had to live with a bad tan until it faded, so hopefully I can help you avoid those mistakes.


Tips and Tricks

Exfoliate. Exfoliate. Exfoliate

I cannot stress this enough. If you have ANY dry patches on your skin, self tanner WILL stick to it. Regardless of the kind you’re using, you will end up with a dark spot. Just like some makeup, self tanners cling right onto dry patches.

Most tanning companies recommend exfoliating 24 hours prior to applying the product. I don’t wait. I typically exfoliate really well right before applying. However, I do not shave right before applying. I also don’t take a super long shower. Hot water opens up your pores, so if you’re spending 30 minutes in a steamy shower and shaving your legs, then immediately applying tanner, you most definitely will have tiny little dots all over your skin. Shaving is a great way to exfoliate your legs, I’ve just found it’s best to plan ahead and shave the day before you’re going to apply.

I’ve noticed that towards the end of the time frame, when I’m getting ready to reapply my tanner, that my skin can start to look a bit dry in some areas (totally depending on the tanner I used) so I’ve started using a dry brush before I shower (also supposed to just be good for your skin in general) and it definitely helps to exfoliate. I’ve been using this from Ecotools and it works great!

Moisturize

I’ve found that it is super important to moisturize your hands, feet, elbows, and knees (areas where the tanner tends to cling to) with a thicker moisturizer before applying. I promise you won’t regret it. I love the Sol de Janeiro Bum Bum Cream, but you can absolutely use something so much more affordable. That’s definitely a splurge, but it’s good stuff. I used a gift card to buy the one I’ve got and I’m trying to make it last as long as possible, because I struggle to justify the price. If you’re okay with the cost, you will definitely not be disappointed by the product. This Soap & Glory The Righteous Butter is a much more affordable option and smells SO GOOD. I definitely recommend something very thick.
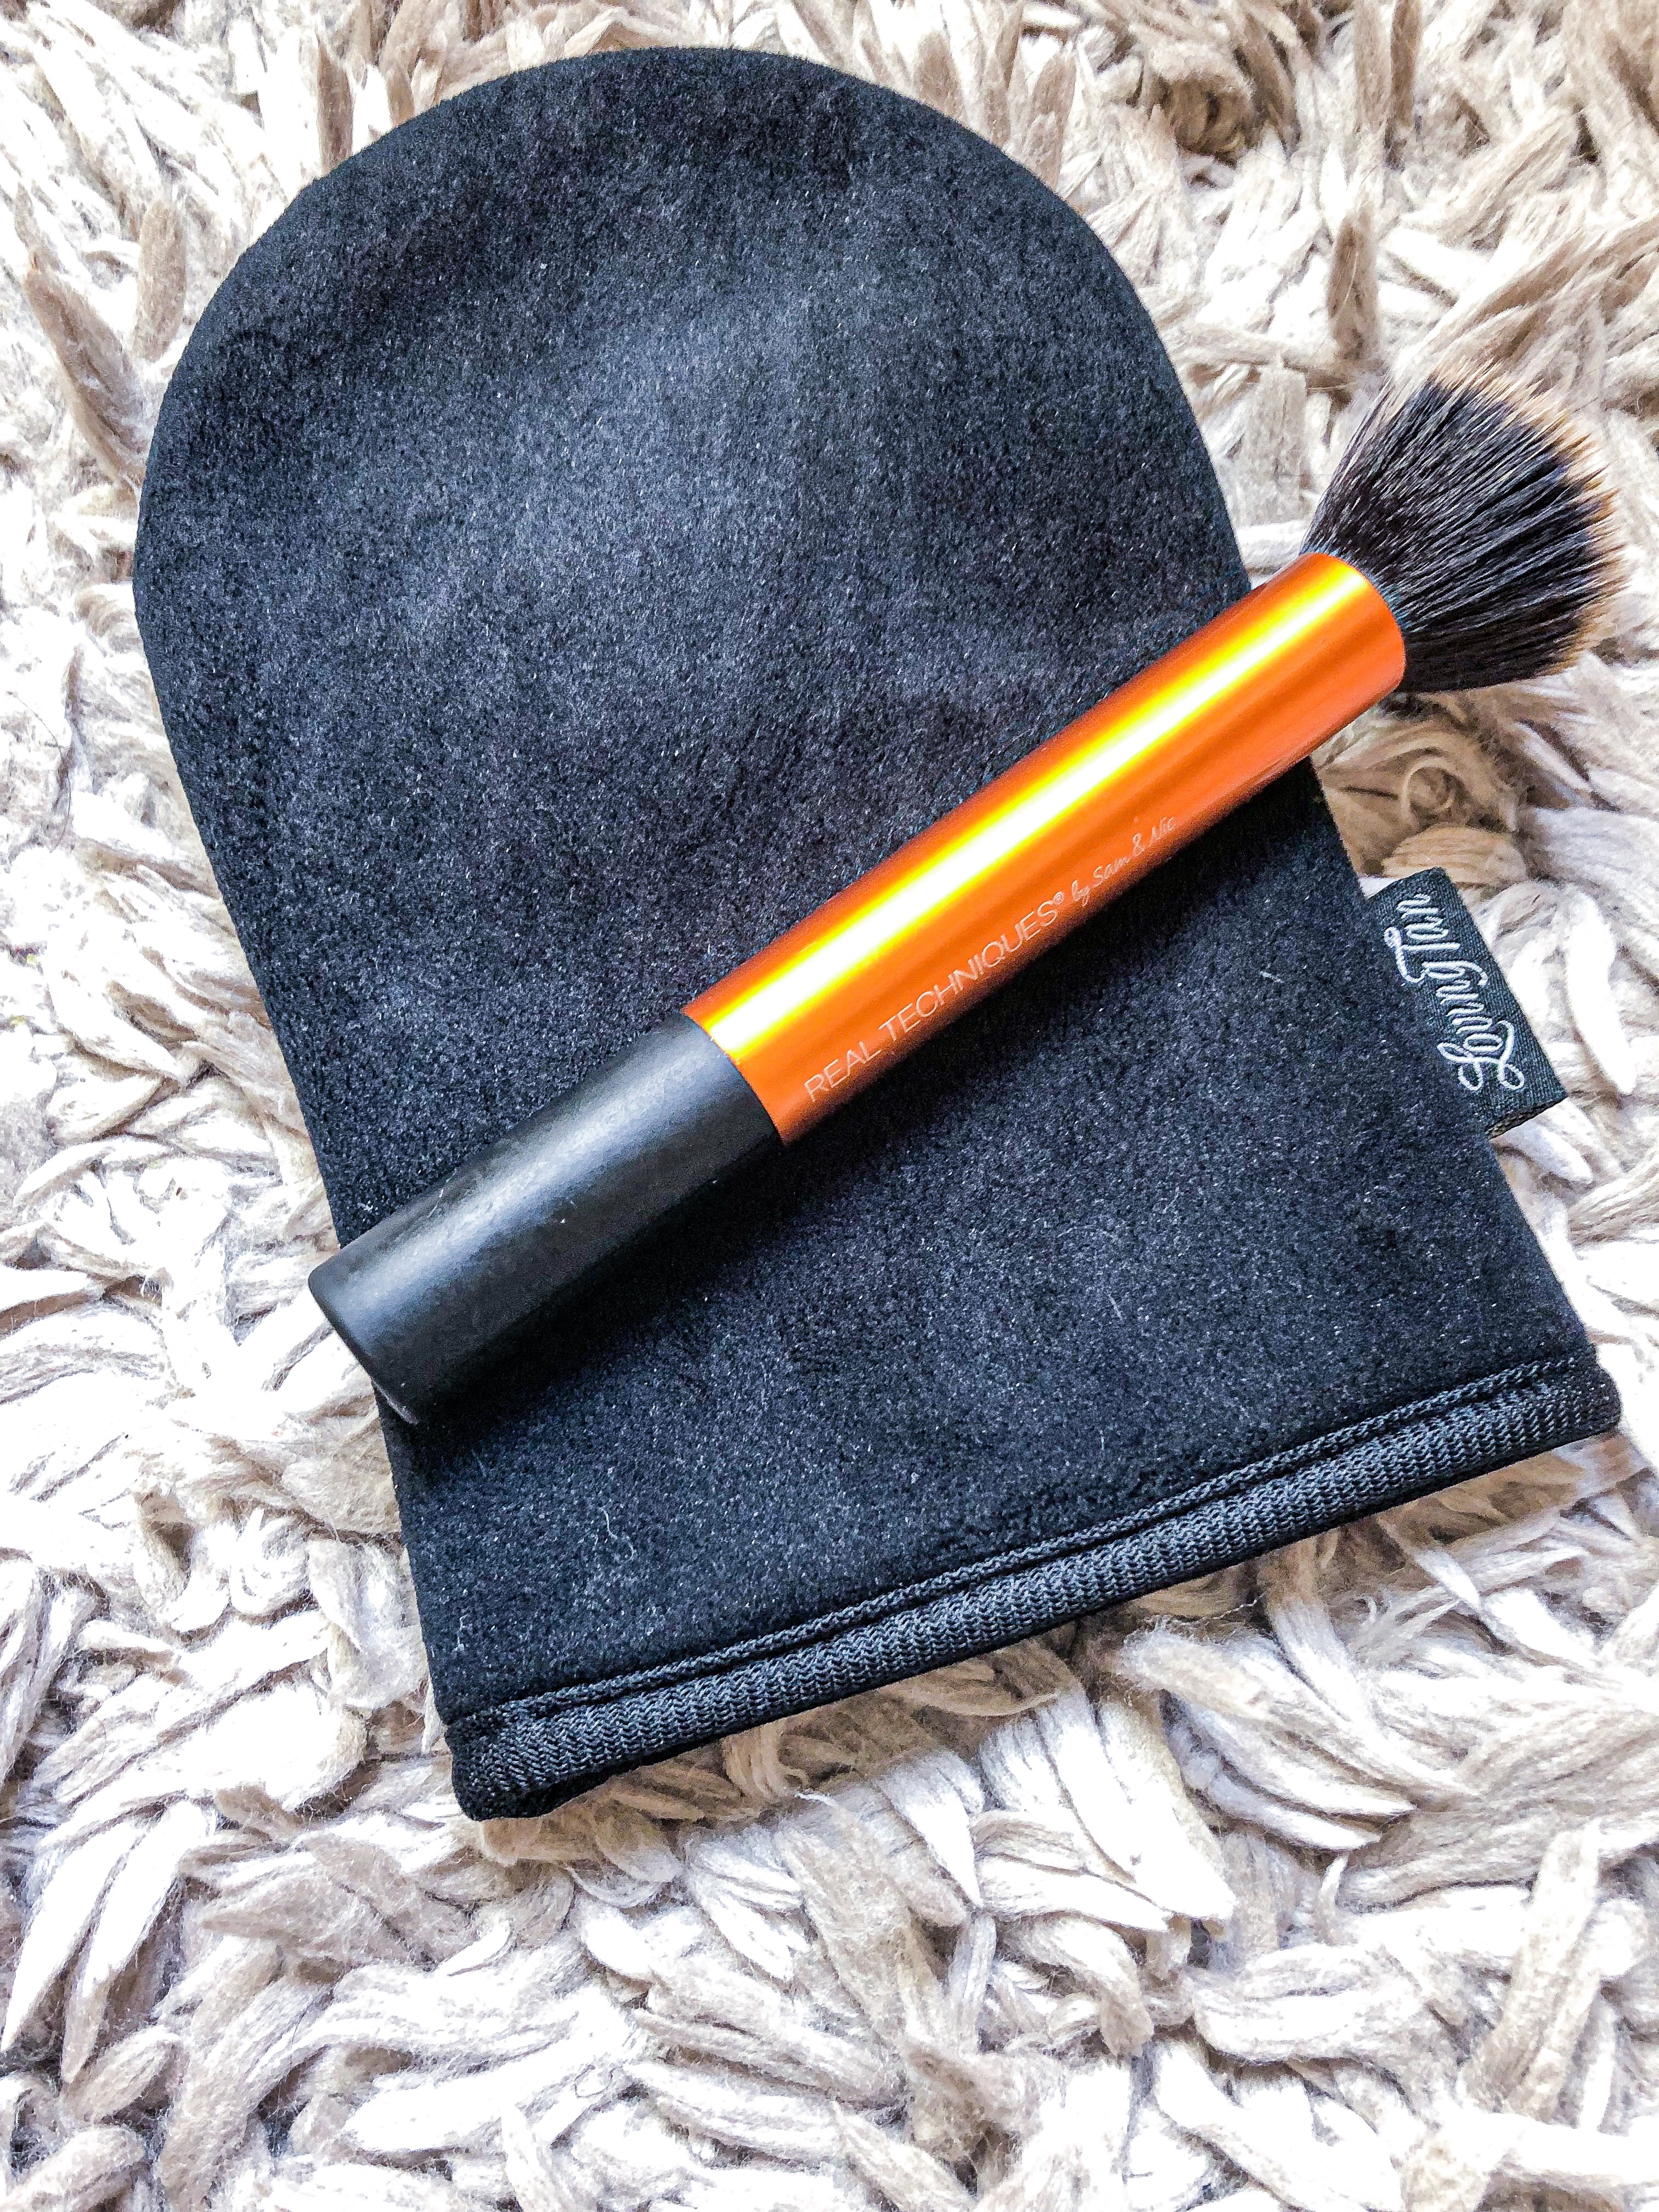
Use a Mitt

I would never, ever, apply a tanner without a mitt. A gradual lotion, maybe. But for any kind of mousse or water, definitely use a mitt. I’ve used a couple of different mitts and my favorite by far, regardless of the tanning product I’m using is the Loving Tan Deluxe Applicator Mitt. This one is the thickest, softest, overall best one in my opinion. You can use either side, which is really nice! I’m definitely looking into getting their Easy to Reach Back Applicator as well, for when my toddler (yes, desperate times call for desperate measures.) and husband are unavailable and I need my back to actually look good.

LovingTan Deluxe Applicator Mitt| Real Techniques Buffing Brush

Hands and Feet…

I’m not sure where I heard about this but ever since I first tried it, it’s the only way I apply to my hands and feet. As I said earlier, I always apply a thick moisturizer to my hands and feet. Once I’m done applying my tanner, to my body, I take a makeup brush (see above) and gently brush the tanner onto my hands and feet until they are evenly coated. This helps so much with not over-applying tanner and having a buildup and dark patches in your knuckles.

Another hand tip I recently read somewhere (โ€ฆ I need to start writing things down, because I never remember who tells me these things.) was that once you’ve applied a light coat of tanner to your hands, rub some more lotion on them. THE MOST IMPORTANT STEP: Rinse your PALMS! Nothing is worse than orange palms, and I promise you no matter what you use, your palms will look orange. Granted, it washes off a lot faster than your body, but you don’t want to have to explain it to people the first few days. 

Foam/Mousse Tanner – Apply Two Coats…

I alway apply one layer, let it dry and then apply another for a darker final result. It has worked for me with every tanner I’ve used and its something I’m going to continue doing as long as I’m applying self-tanner. This doesn’t really apply to a gradual tan or lotion. 

Know What You’re Looking For…

When it comes to self tanning, you have to know what you want. Do you want a super-natural glow to your skin, or do you want to look like you just spent a week in the Caribbean? I prefer the latter, but that’s my personal preference. If I’m taking the time to properly apply my tanner, I want it to be dark. I’ll be talking about my favorites of both types of self-tanners.


My Routine

Like I mentioned above, I use my dry brush to exfoliate before I get in the shower. I make sure itโ€™s been at least a day since I last shaved. I shower as normal, using exfoliating gloves like these.

After I shower, I apply a thick lotion to my hands, feet, ankles, knees, and elbows. Basically any area where the tanner might cling to and cause a dark spot to develop.

Once Iโ€™ve got the lotion applied I take the foam and pump it onto the mitt. I generously apply it to my entire body, going lightly on the areas with lotion.

After Iโ€™ve got my entire body covered, except my hands and feet, I let that coat dry and apply another.

Once Iโ€™ve completed the second coat, I take a makeup brush, like the one pictured above, and a small amount of the foam and brush it onto my hands and feet.

The last step is to take a hand cream and rub it in over the tanner. Followed by a thorough rinsing of my palms. Nobody wants orange palms.

Then, I put on my โ€œtanningโ€ pajamas that cover mostly all of my body, some slippers, and pour myself a nice large cold brew coffee and slowly sip it while I relax on the couch. LOL just kidding about the relax part. I havenโ€™t relaxed since… I canโ€™t even remember. I do actually pour myself coffee. Unless itโ€™s nighttime and Iโ€™m going to sleep in the tanner, then I pour myself a glass of wine.

When the time is up, 2, 3, or 8 hours, I rinse off the tan. When I say rinse I mean just that. I spend less than a minute in a warm shower (Not hot. If youโ€™re anything like me your normal shower temperature is just a few degrees shy of the temperature of the sun. And Iโ€™m sure thereโ€™s no correlation between that and my dry skin…) just rinsing off the color guard. I usually wait about 24 hours after applying the tanner to actually wash my body with soap.

Usually after about 3 days, I’ll start using either The Gradual, or The Body drops mixed in with my lotion, every so often until I’m ready to reapply my tanner.

** I donโ€™t apply my tanner to my face, I just use a slightly darker foundation and bronzer to match it to my body.
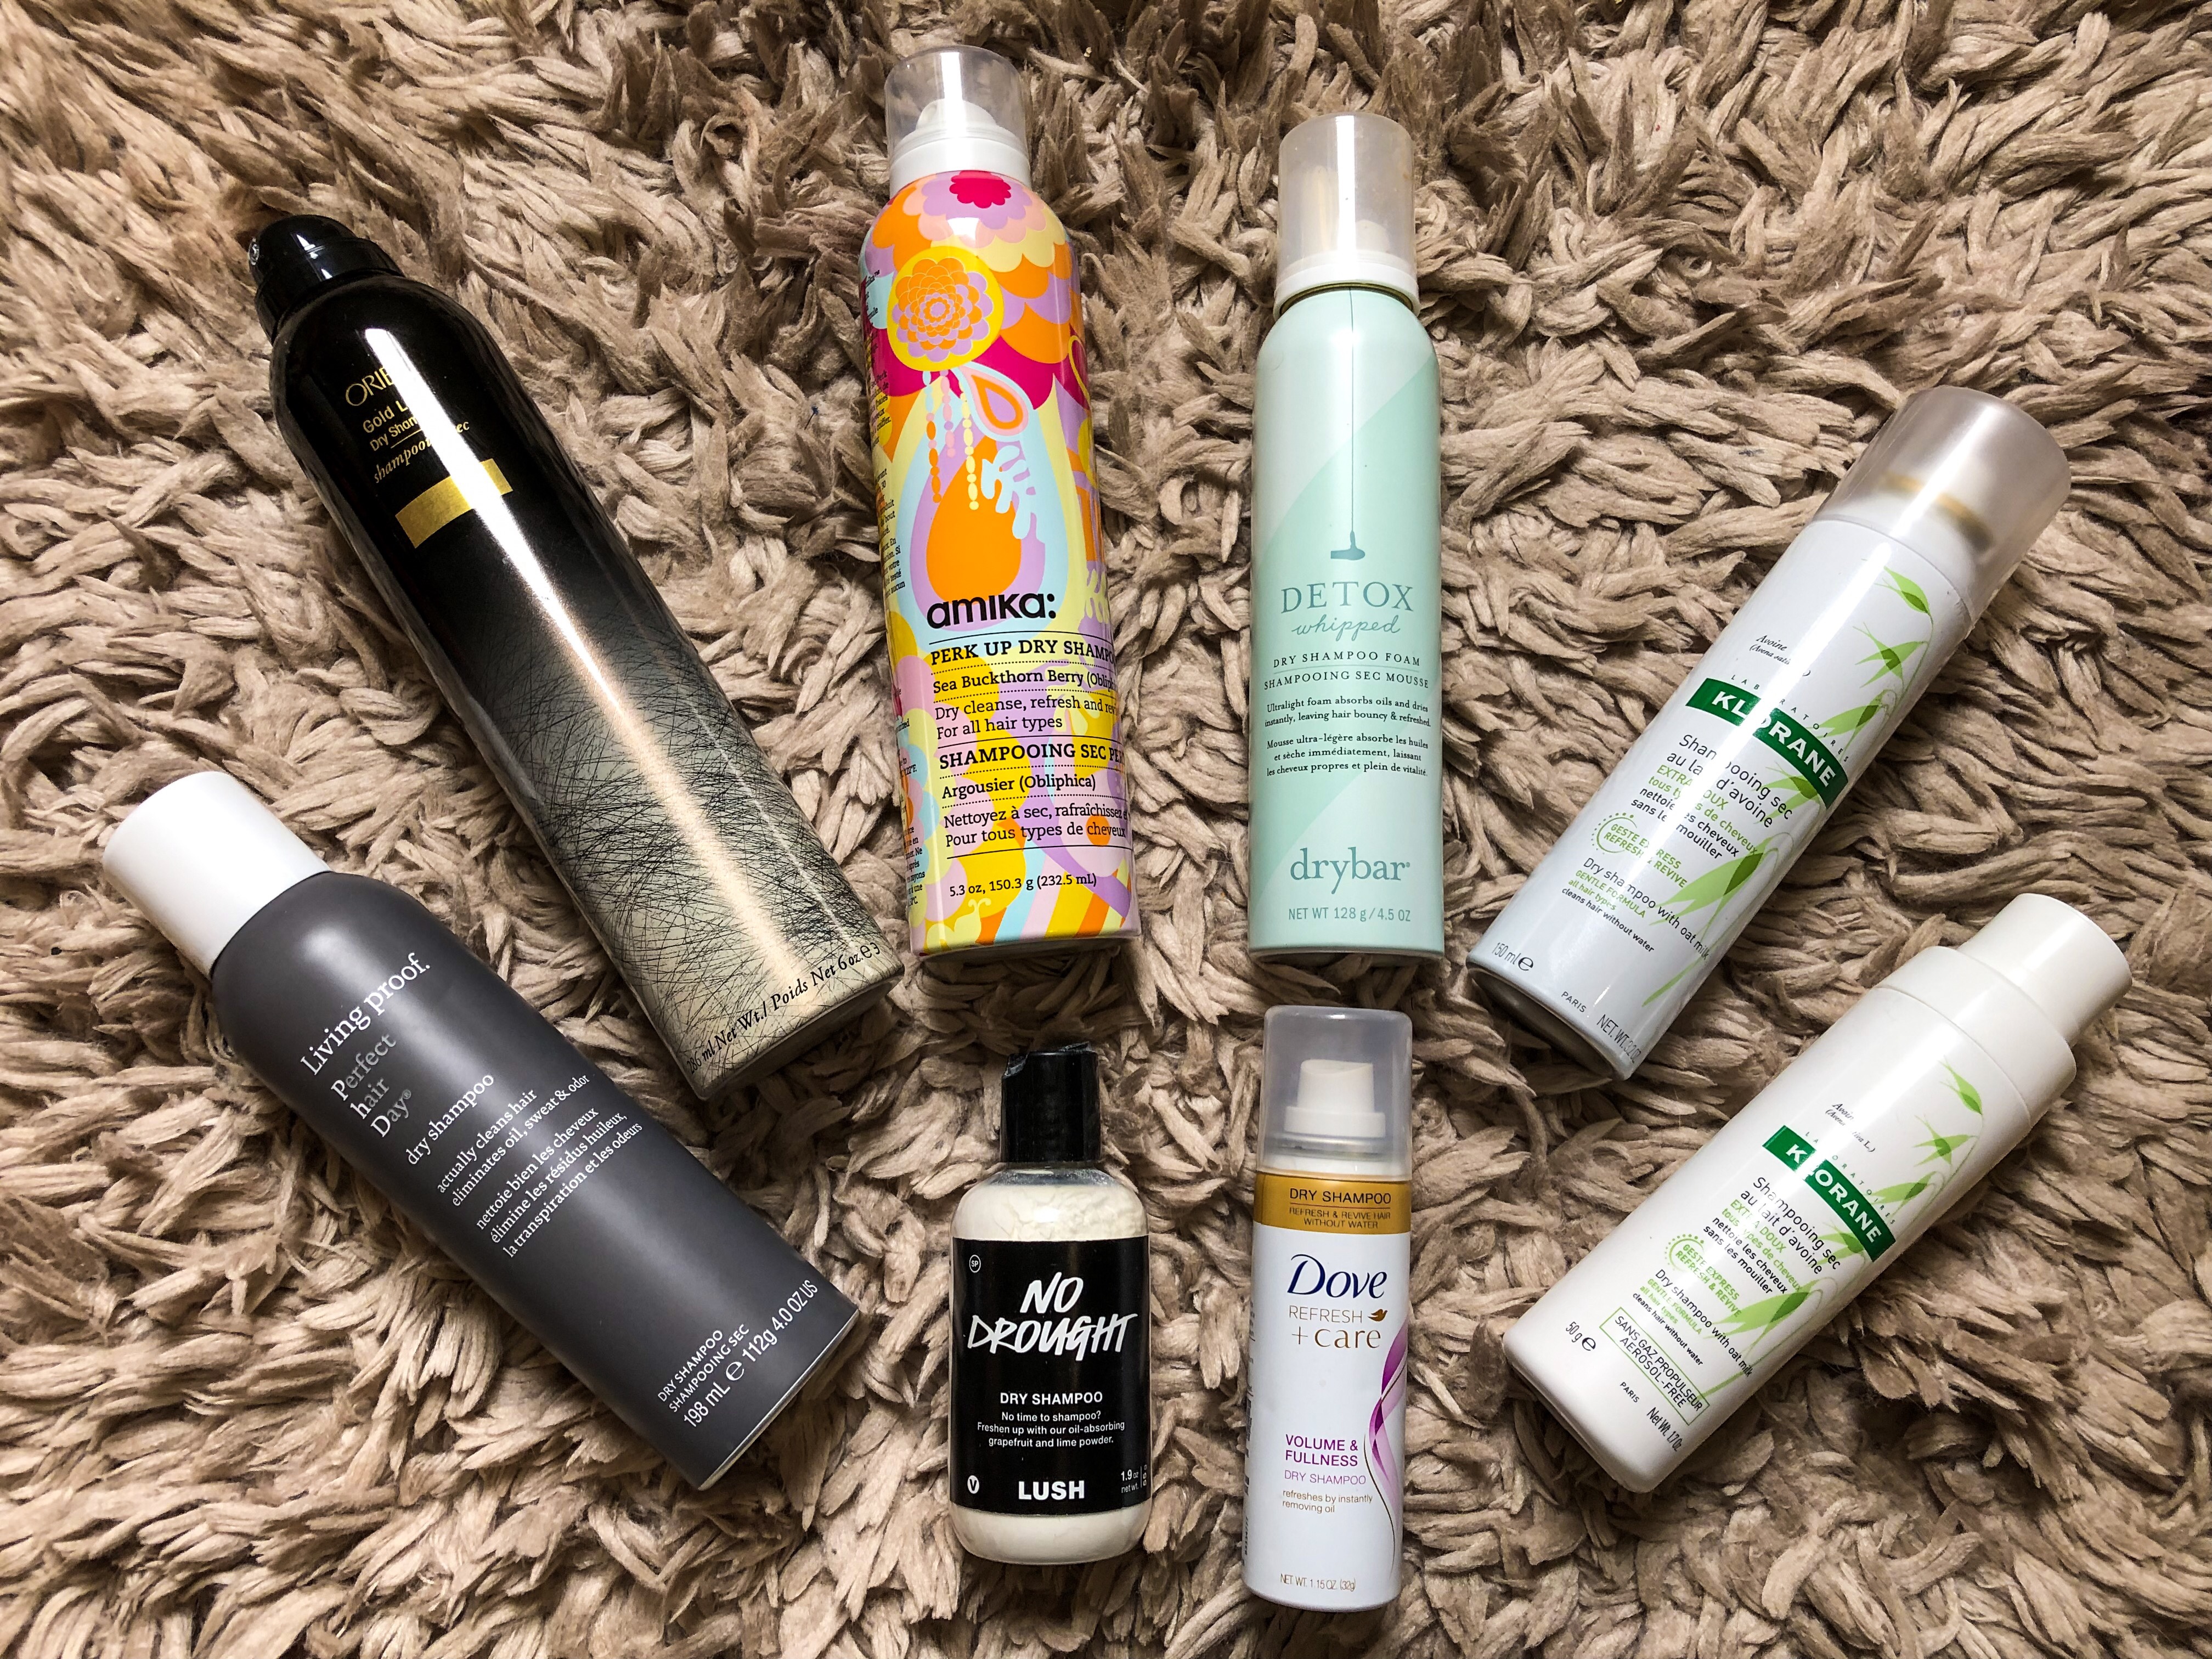
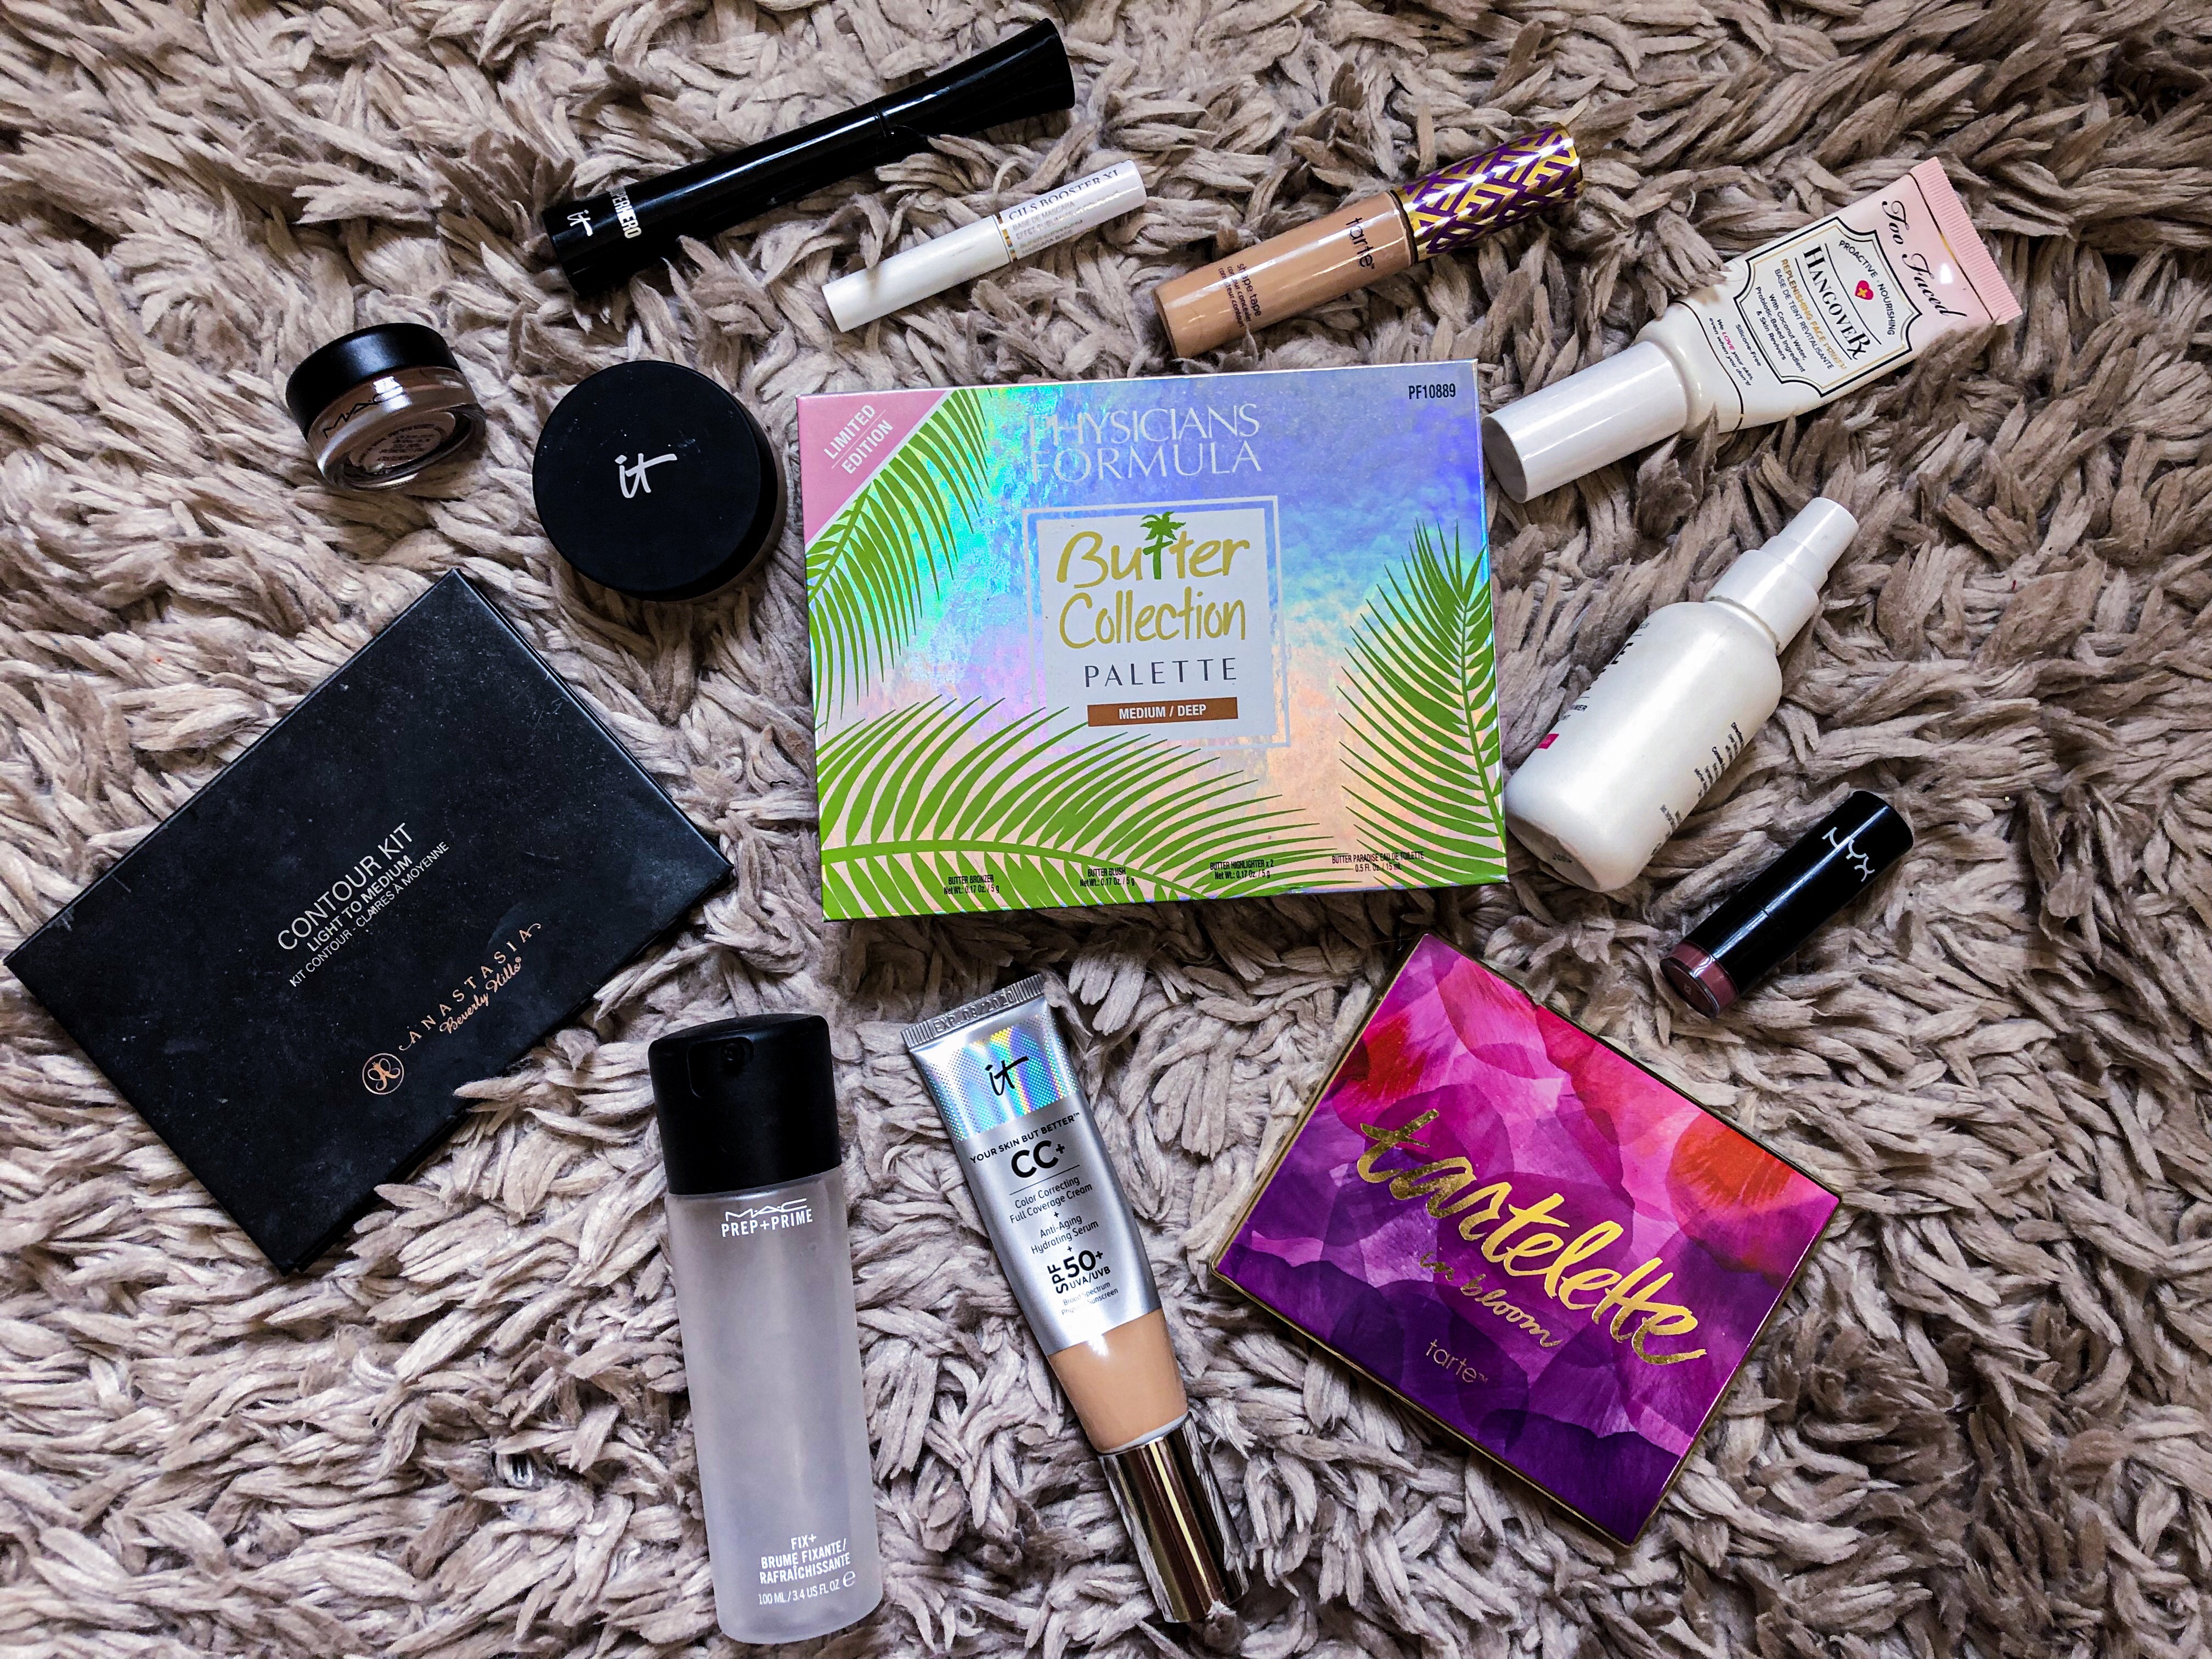
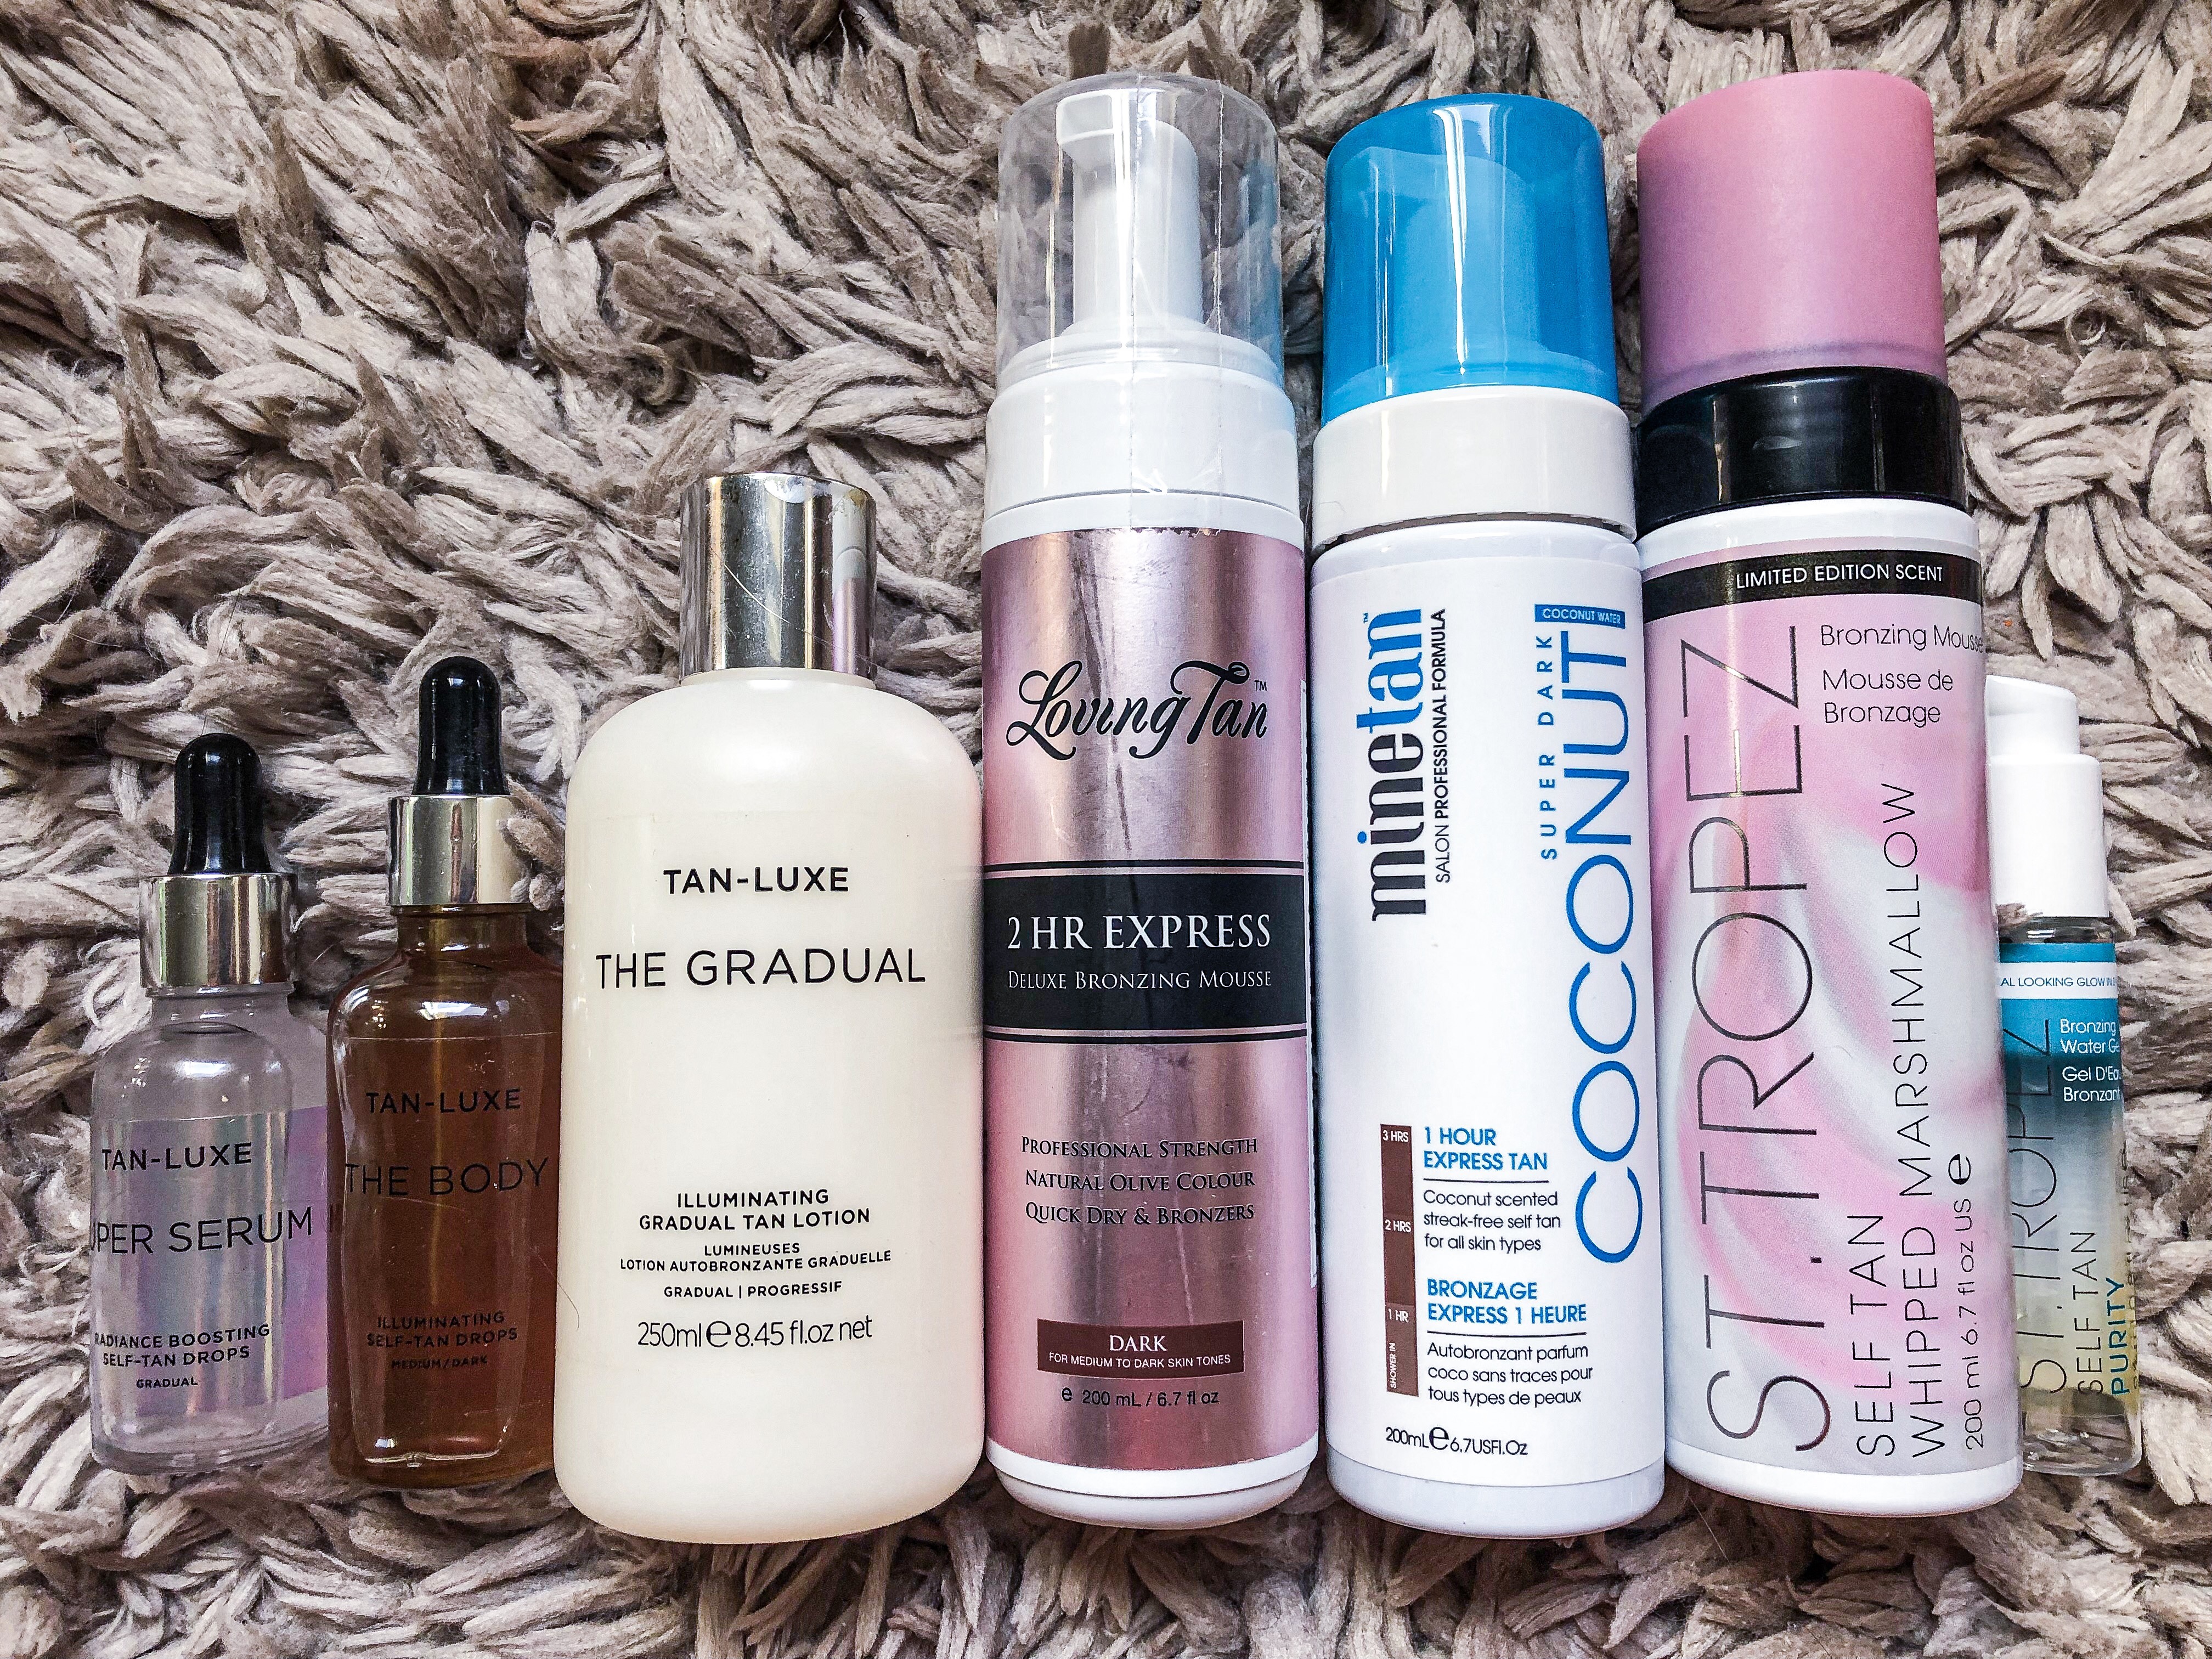

Products:

Loving Tan

Loving Tan 2HR Dark Mousse

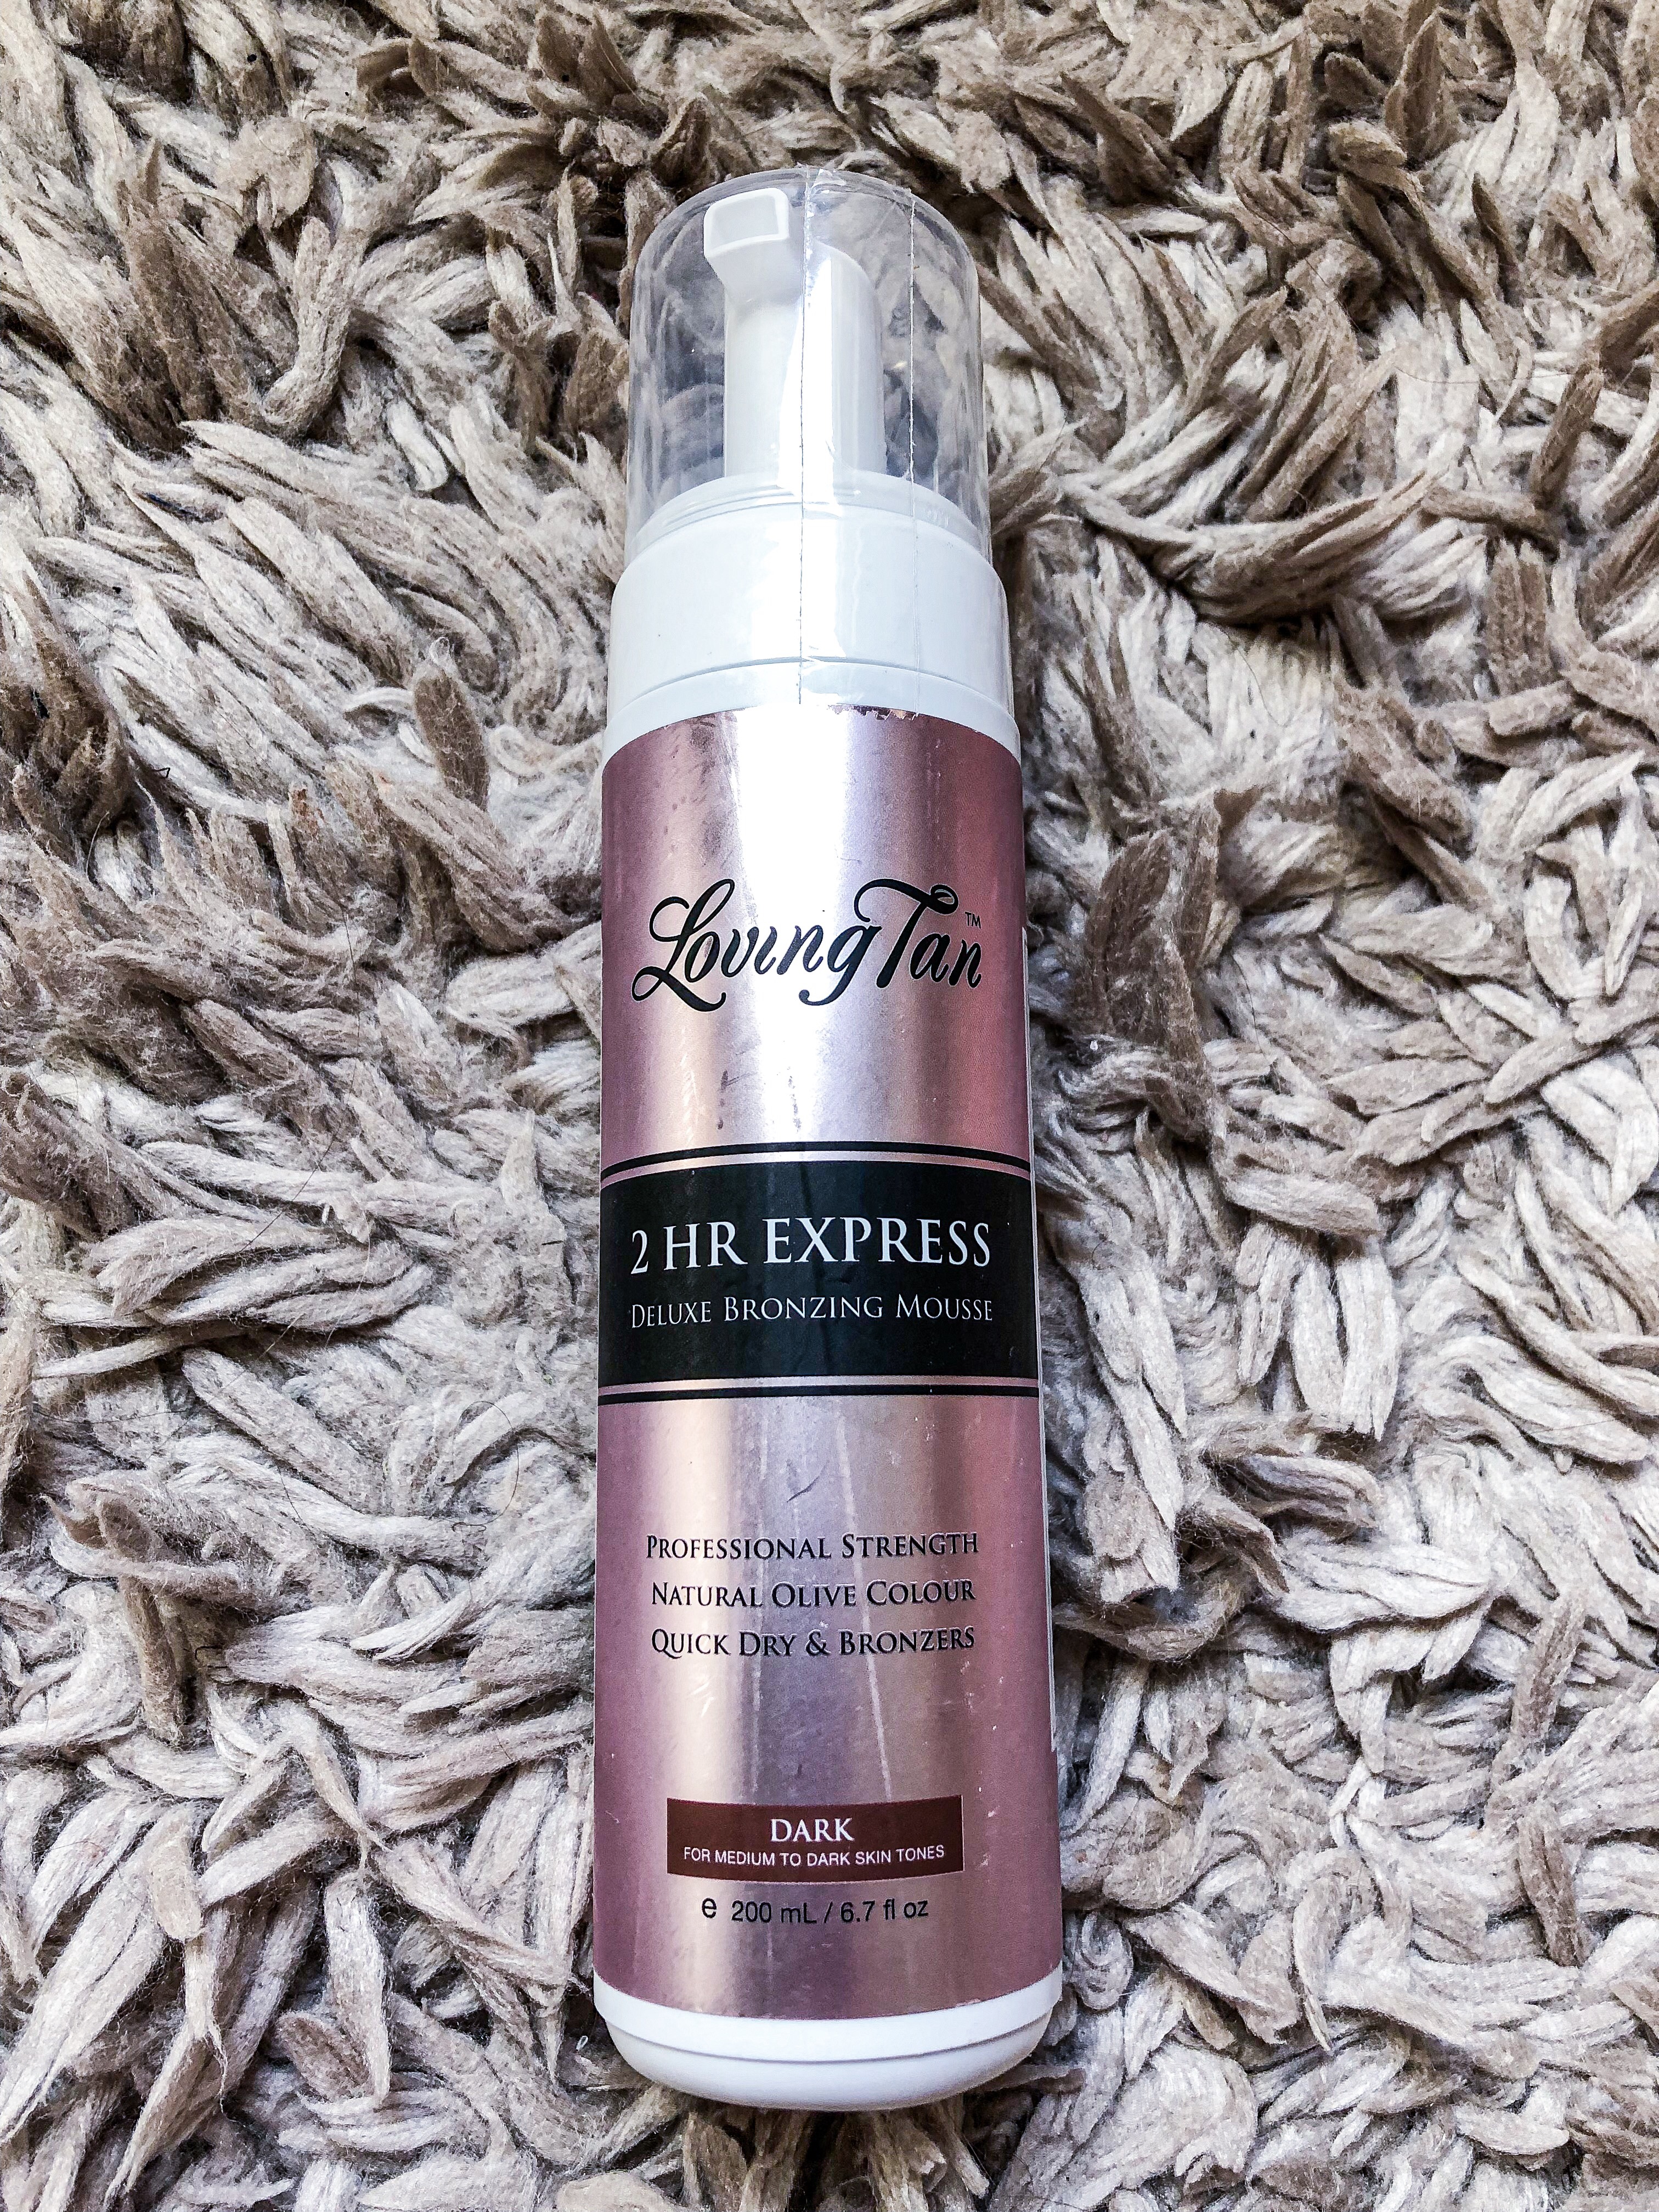
My overall favorite is the Loving Tan 2 Hour Express in Dark. I’m pretty fair skinned, naturally, but when it comes to tanner, I like to go with the darker option. If I’m spending all this time prepping my skin and applying it, then sitting around for a couple of hours with it developing, why not go dark. I’m not the fairest of the fair, but I’m pretty close. I have never had an issue with this being too dark for me. I love that you can rinse it off after two hours. So much better than putting it on before bed and sleeping in it. Although they do make an 8 hour version and based on the reviews I’ve read, it gets slightly darker. They also have an 8 hour version in Ultra-Dark. 

Another plus? No smell! I cannot stand the smell that some fake tan products have. I’m super sensitive to smells, so that may not bother some people, but I can’t handle it. Which is why I love this stuff!

It’s has an olive base, so you will never get that orangey, unnatural looking tan with this product. I always buy the biggest bottle because I know I’ll use it. The smaller bottle is $40, which is know is a lot, but it lasts a while for me. And honestly, $40 is pretty comparable to most other tanning products on the market.

MineTan

MineTan Coconut

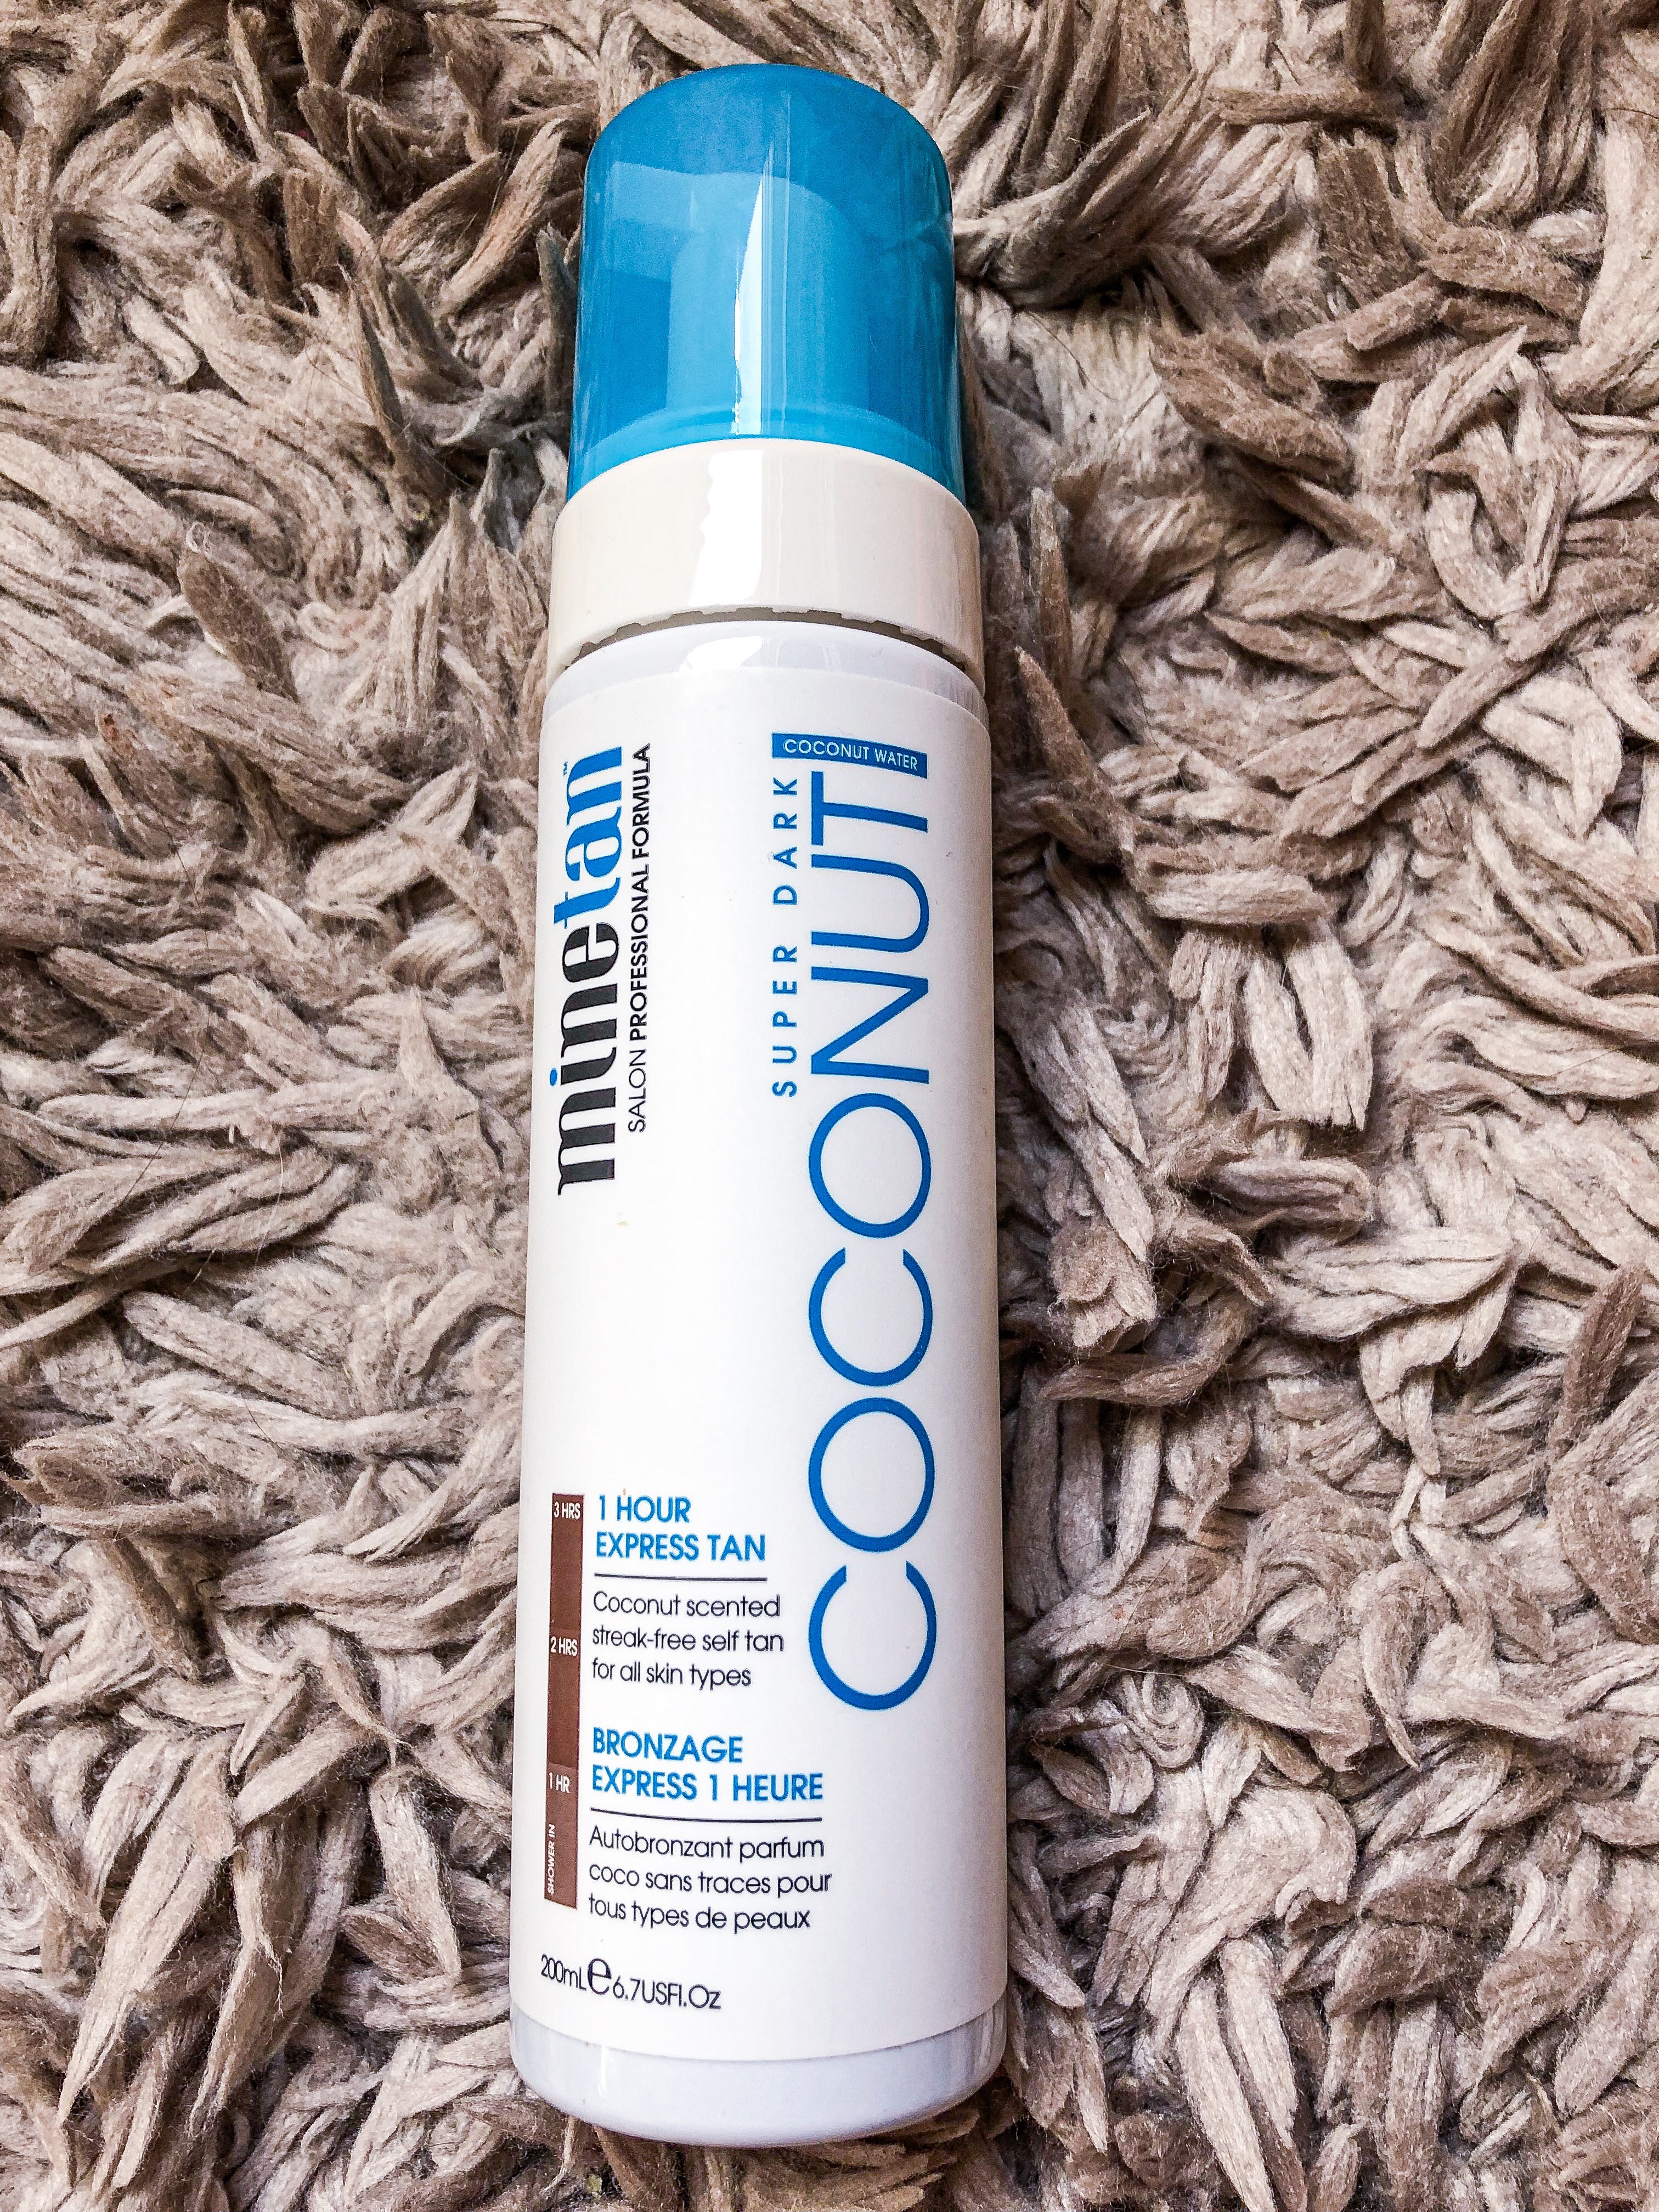
Another one that I’m really liking is the MineTan Coconut. I’ve actually been wanting to try some of the other products from this brand, but I need to work through what I’ve got right now.

It gives a very natural, even tan. It’s definitely lighter than the Loving Tan, but it still looks really good! It’s easy to apply, has a color guard so you can see everywhere it’s going, and has a nice refreshing Coconut smell. It is a very light scent, so don’t let that deter you. Once it’s on and dry, it doesn’t smell at all. You have the option to leave it on anywhere from 1 to 3 hours. I’m sure you could leave it on longer if you want, but honestly I hate sitting around with tanner on so I rinse it off as soon as the 3 hour mark hits. I’ve never left it on less than 3 hours, because again, I’m taking the time to prep my skin, I’m going to attempt for the darkest color possible. 

St. Tropez

St Tropez Whipped Marshmallow Bronzing Mousse

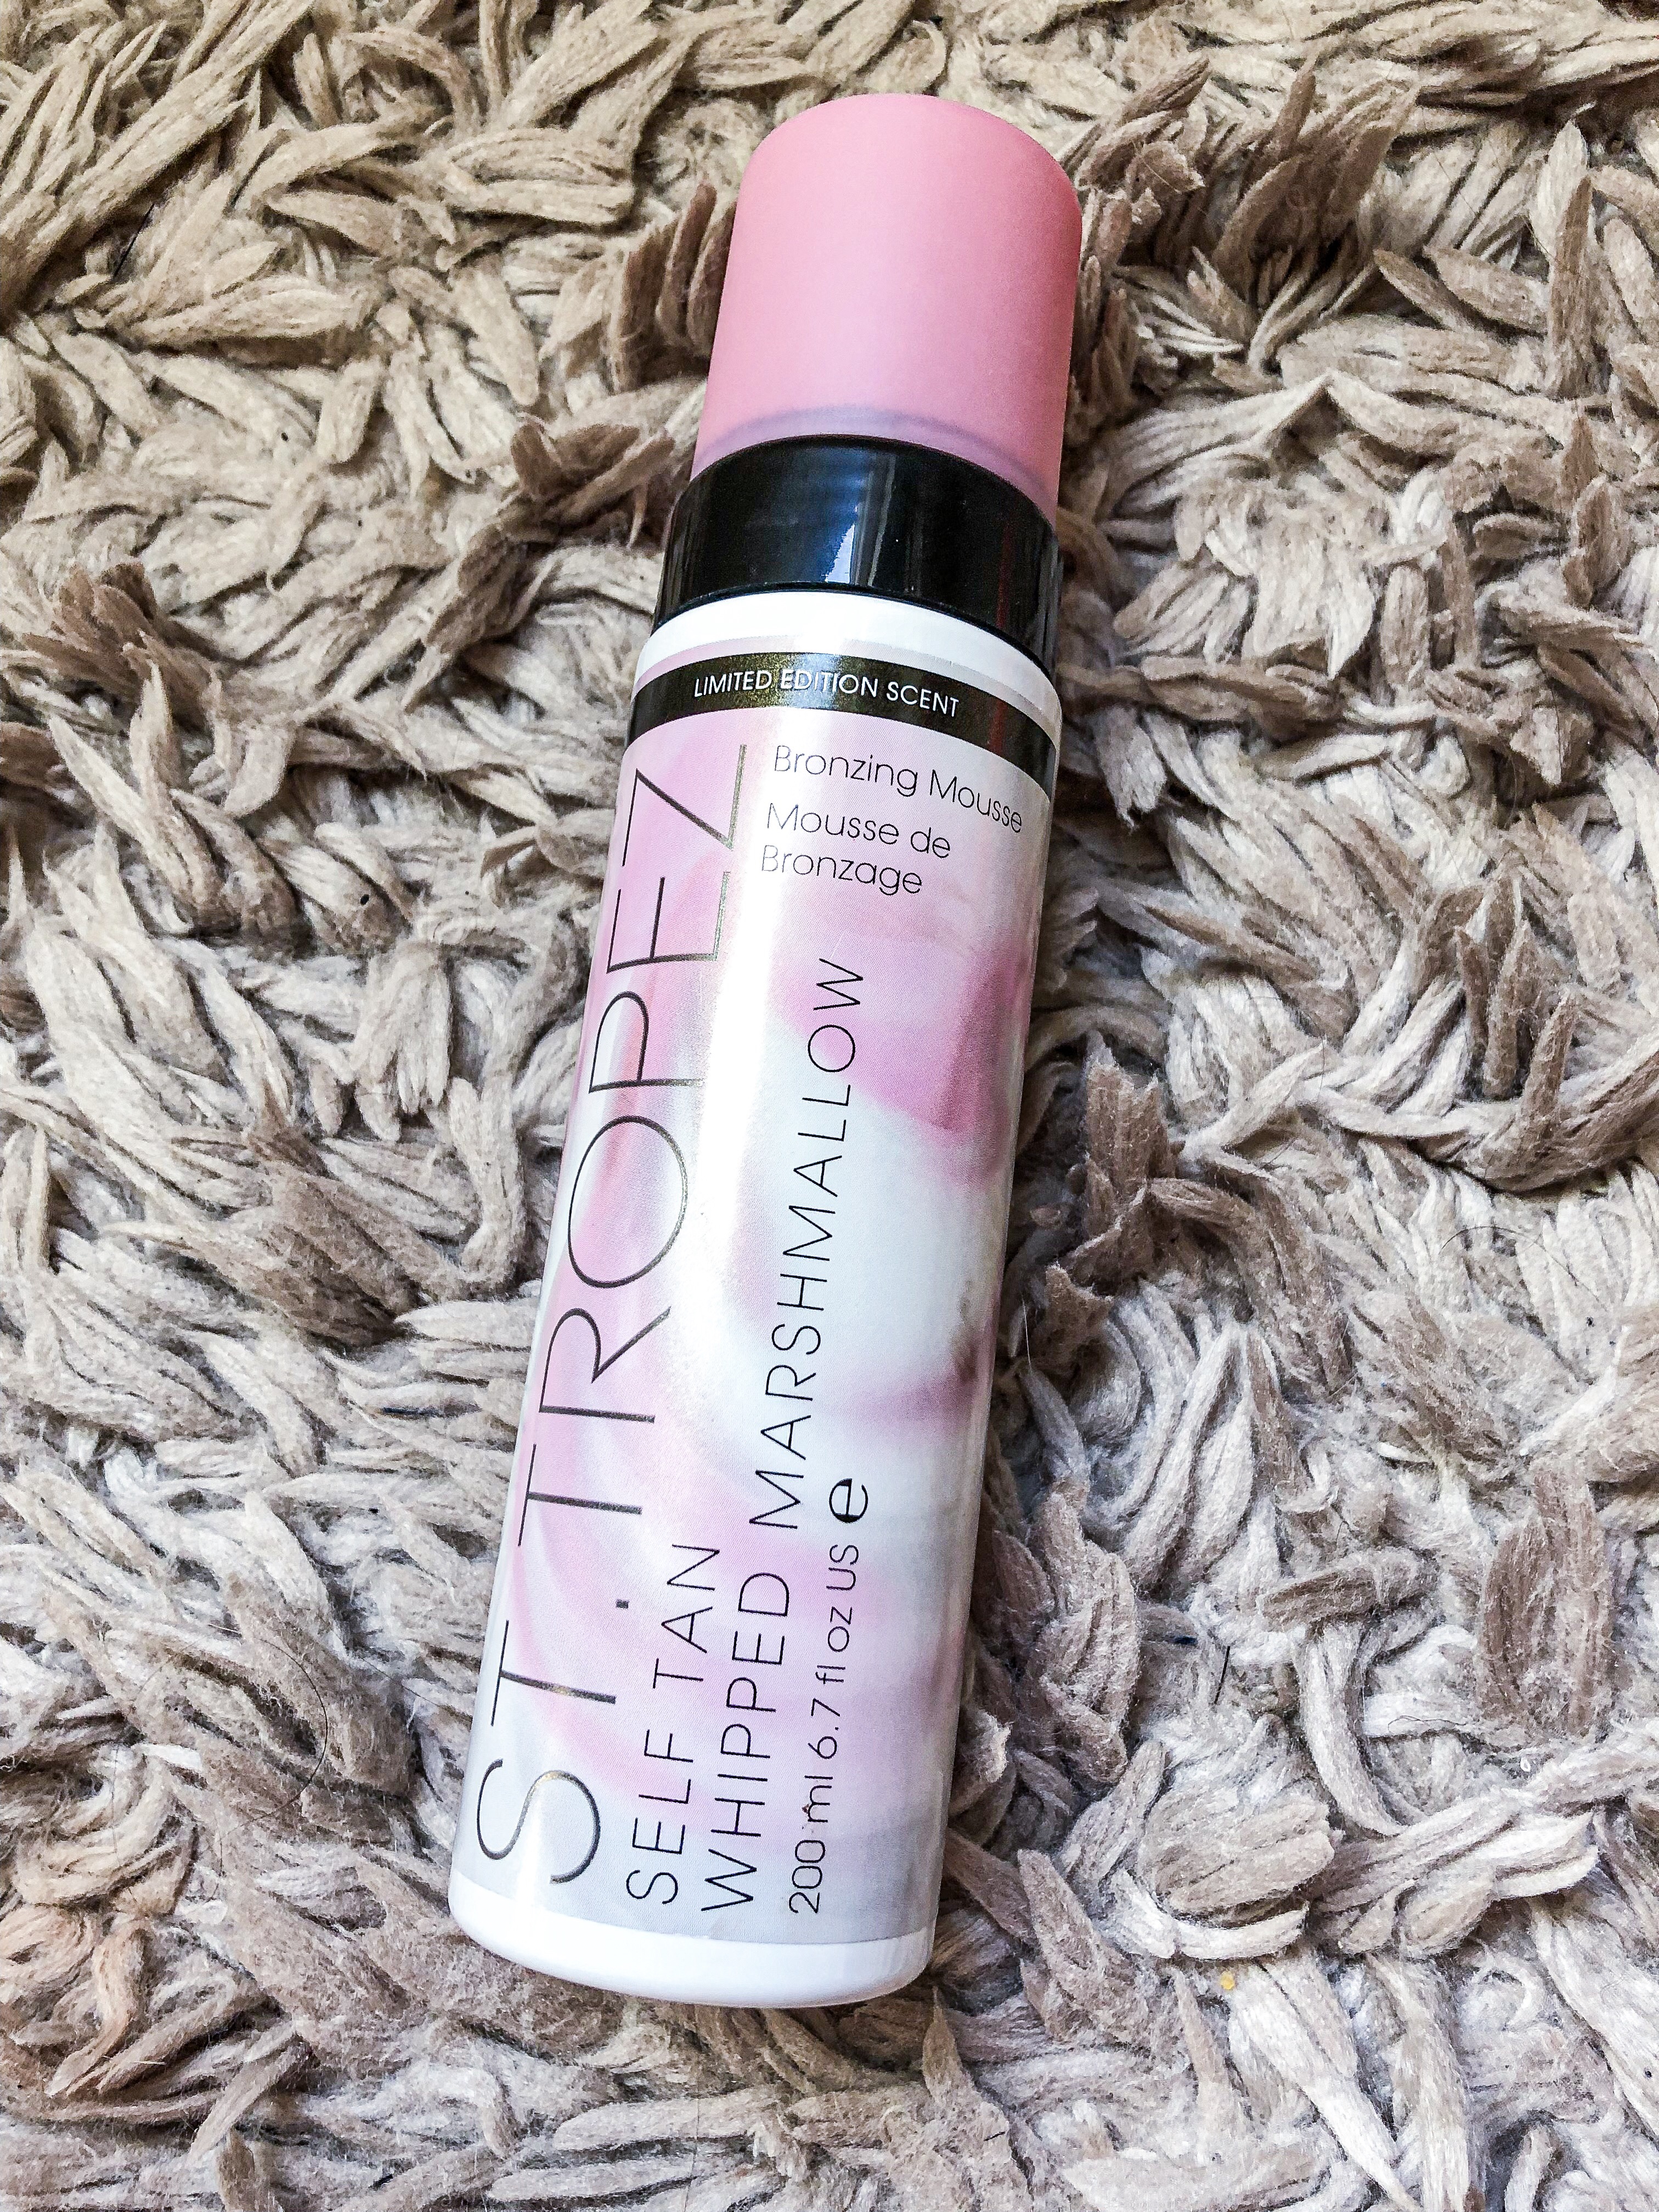
St. Tropez has a serious cult following. Its honestly one of the first tanning brands that comes to my mind when I think about self-tanner. It’s very well-known. There is a reason for that. It’s so easy to use. It has a color guard just like the other two I mentioned. You know where you’re putting it and that is so helpful. The only St. Tropez mousse I’ve used is the Whipped Marshmallow Bronzing Mousse. Its great! If I’m being honest, I got this one because for $45 it came with a mitt and the other one was the same price and didn’t come with a mitt. However, I mentioned above, the Loving Tan mitt is still my favorite. This one worked. It got the job done, but it just isn’t my favorite.

It claims to have a marshmallow scent. I don’t agree. At first application, it definitely does have a slightly sweeter smell, but after a few hours, I smell that fake tan smell. It does rinse off with the color guard and I don’t smell it after I’ve rinsed, but I just hate that smell. It gives a nice natural color. I’m sure that if you used the darker shade, it would give you a darker color. I’m definitely interested to try their express version, because this one needs to sit on the skin for 4-8 hours. I don’t enjoy sleeping with this stuff on, which honestly might be the only reason it’s not the best.

St Tropez Purity Water Gel

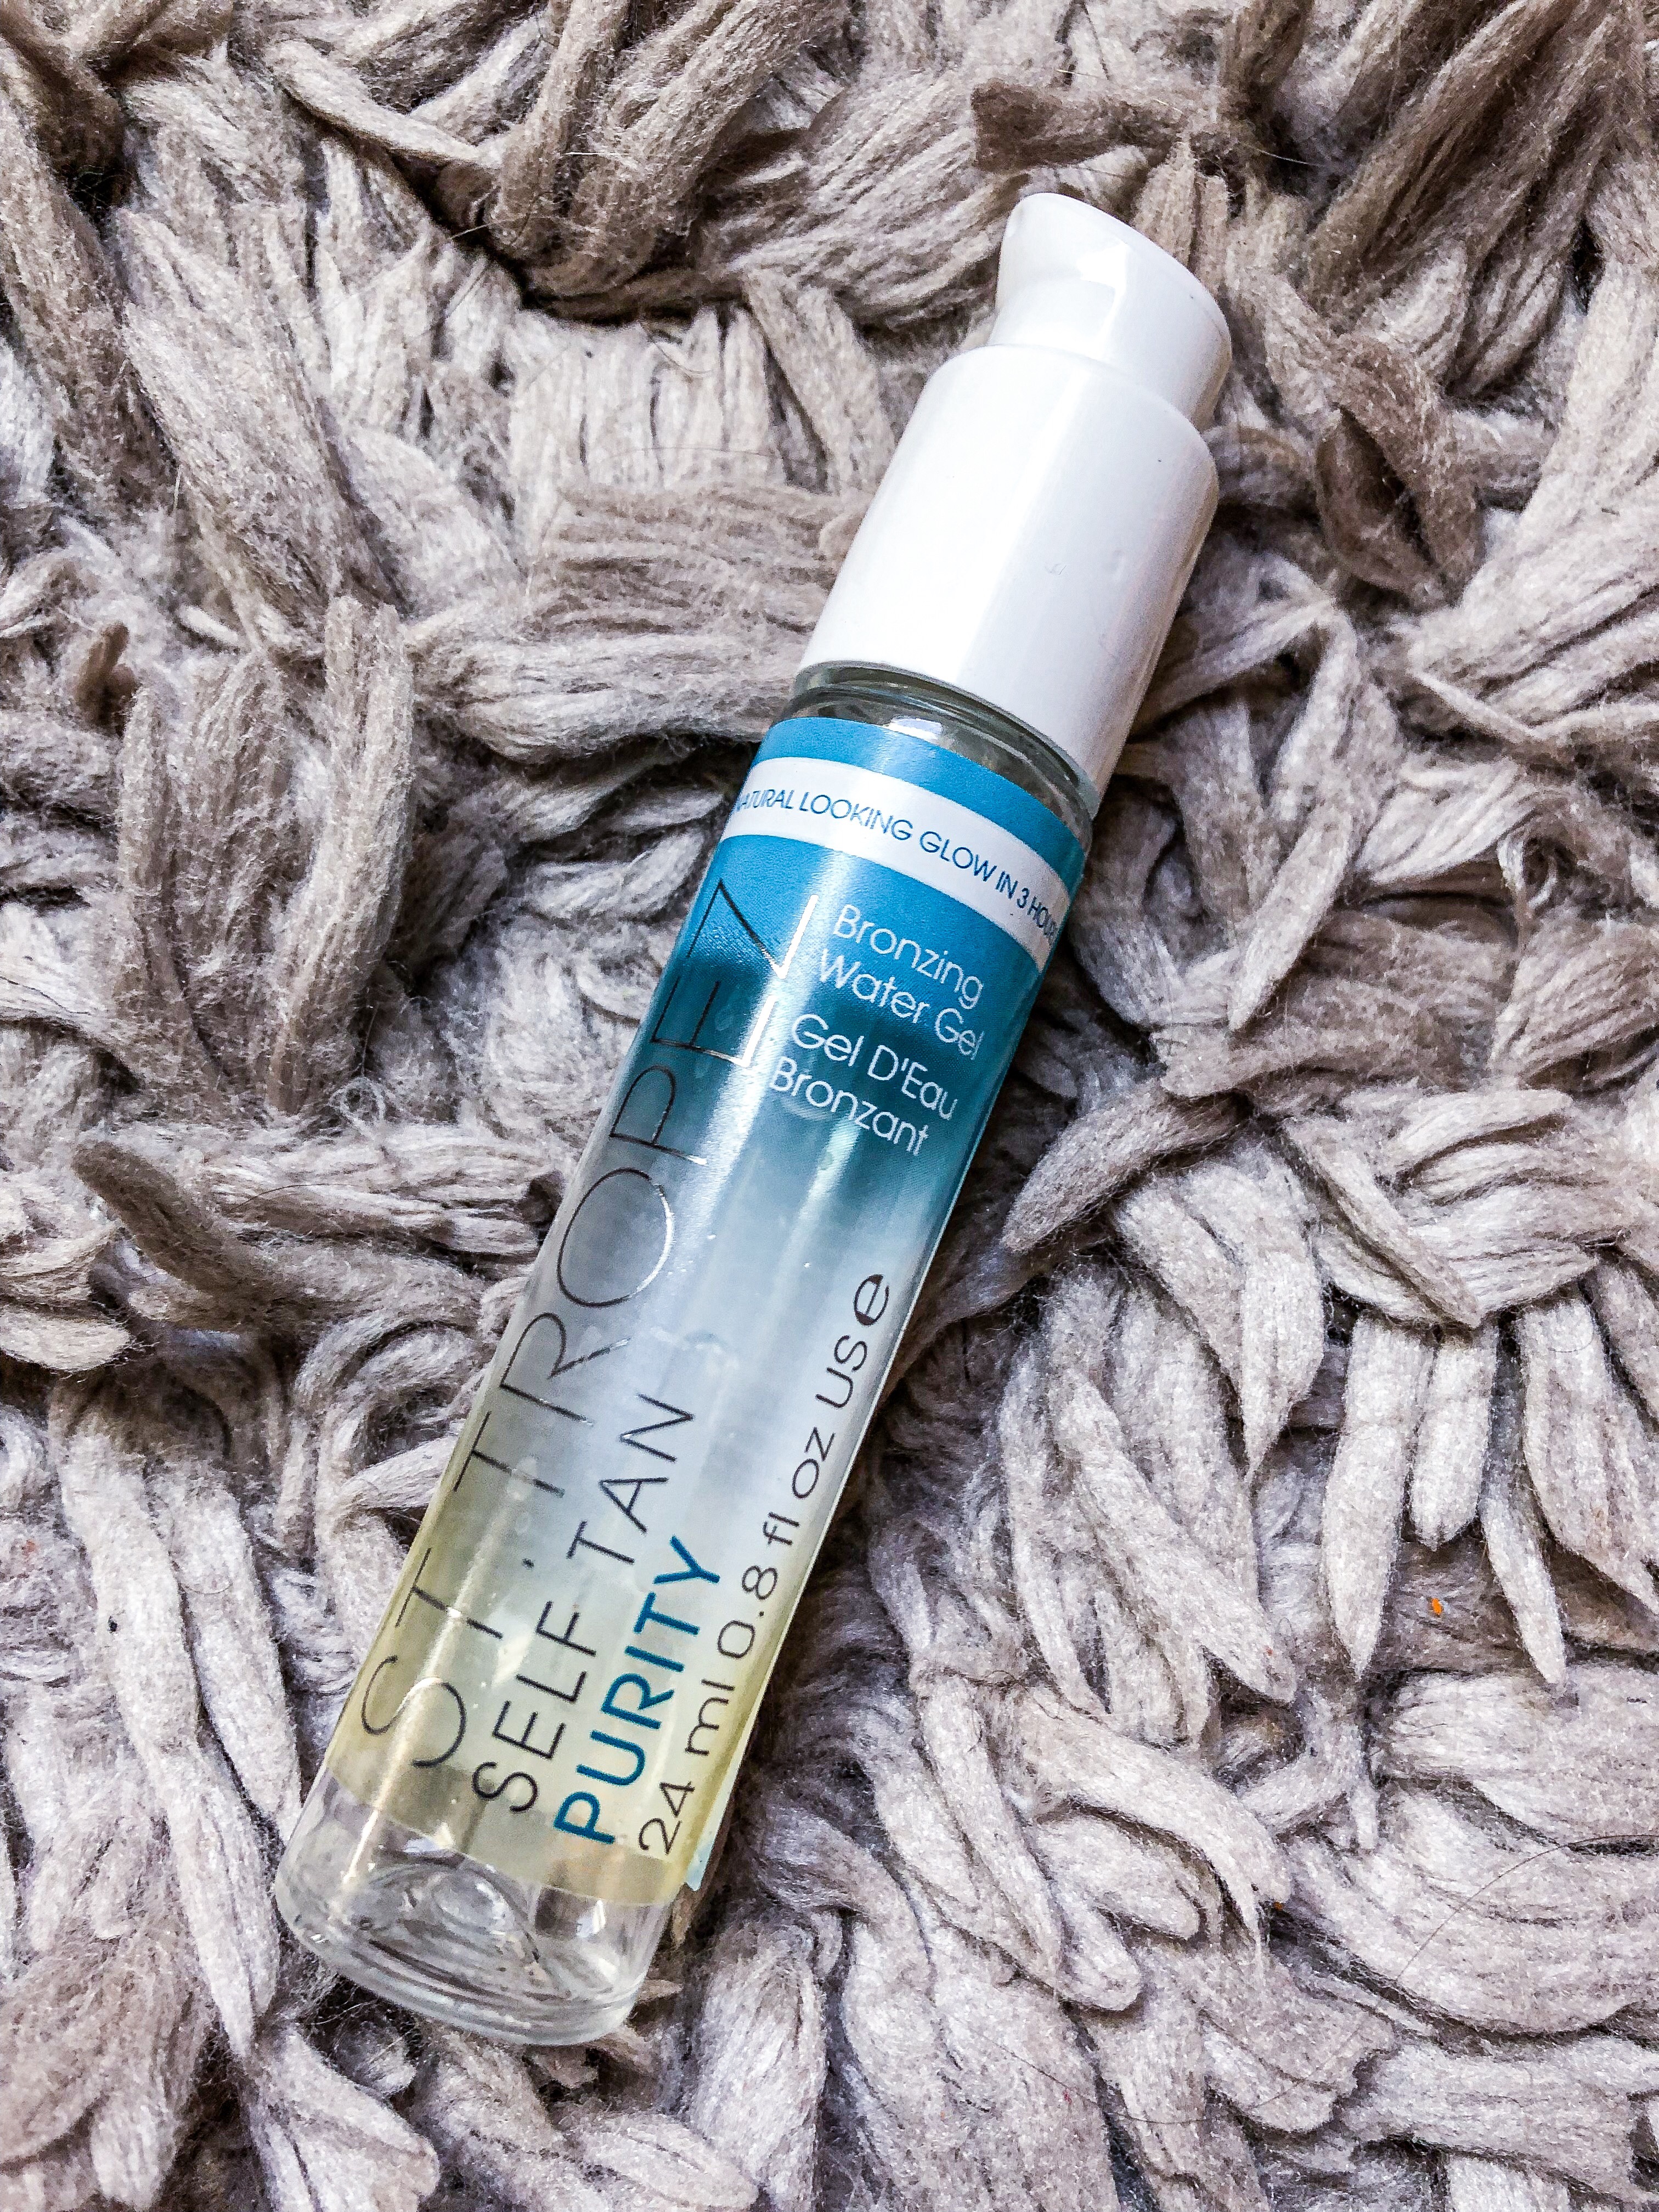
Another St. Tropez product that I’ve tried is the Purity Water Gel. I had gotten a sample in a beauty box and it was about enough for two applications. I liked the smell of this, and I liked that it was clear so that I could just apply it and go about my day. No color guard, however, means you don’t know exactly where you’ve already applied it. I did it two different times and had no issues with missed spots or patches anywhere. I liked the color it gave. It was a very natural, subtle tan. So if you’re looking to be ultra dark, this is not for you. If your looking for a more natural glow, this is definitely something you’ll like.

Tan-Luxe

Tan Luxe is a very, well I guess the name says it, but luxe brand. It just feels fancy. I honestly haven’t met a product from this brand that I don’t love. Everything works really well for me, and has given me no issues. Never an orange tint, never streaky or blotchy. It’s definitely a pricier brand, but its so worth the money.

Tan-Luxe The Gradual

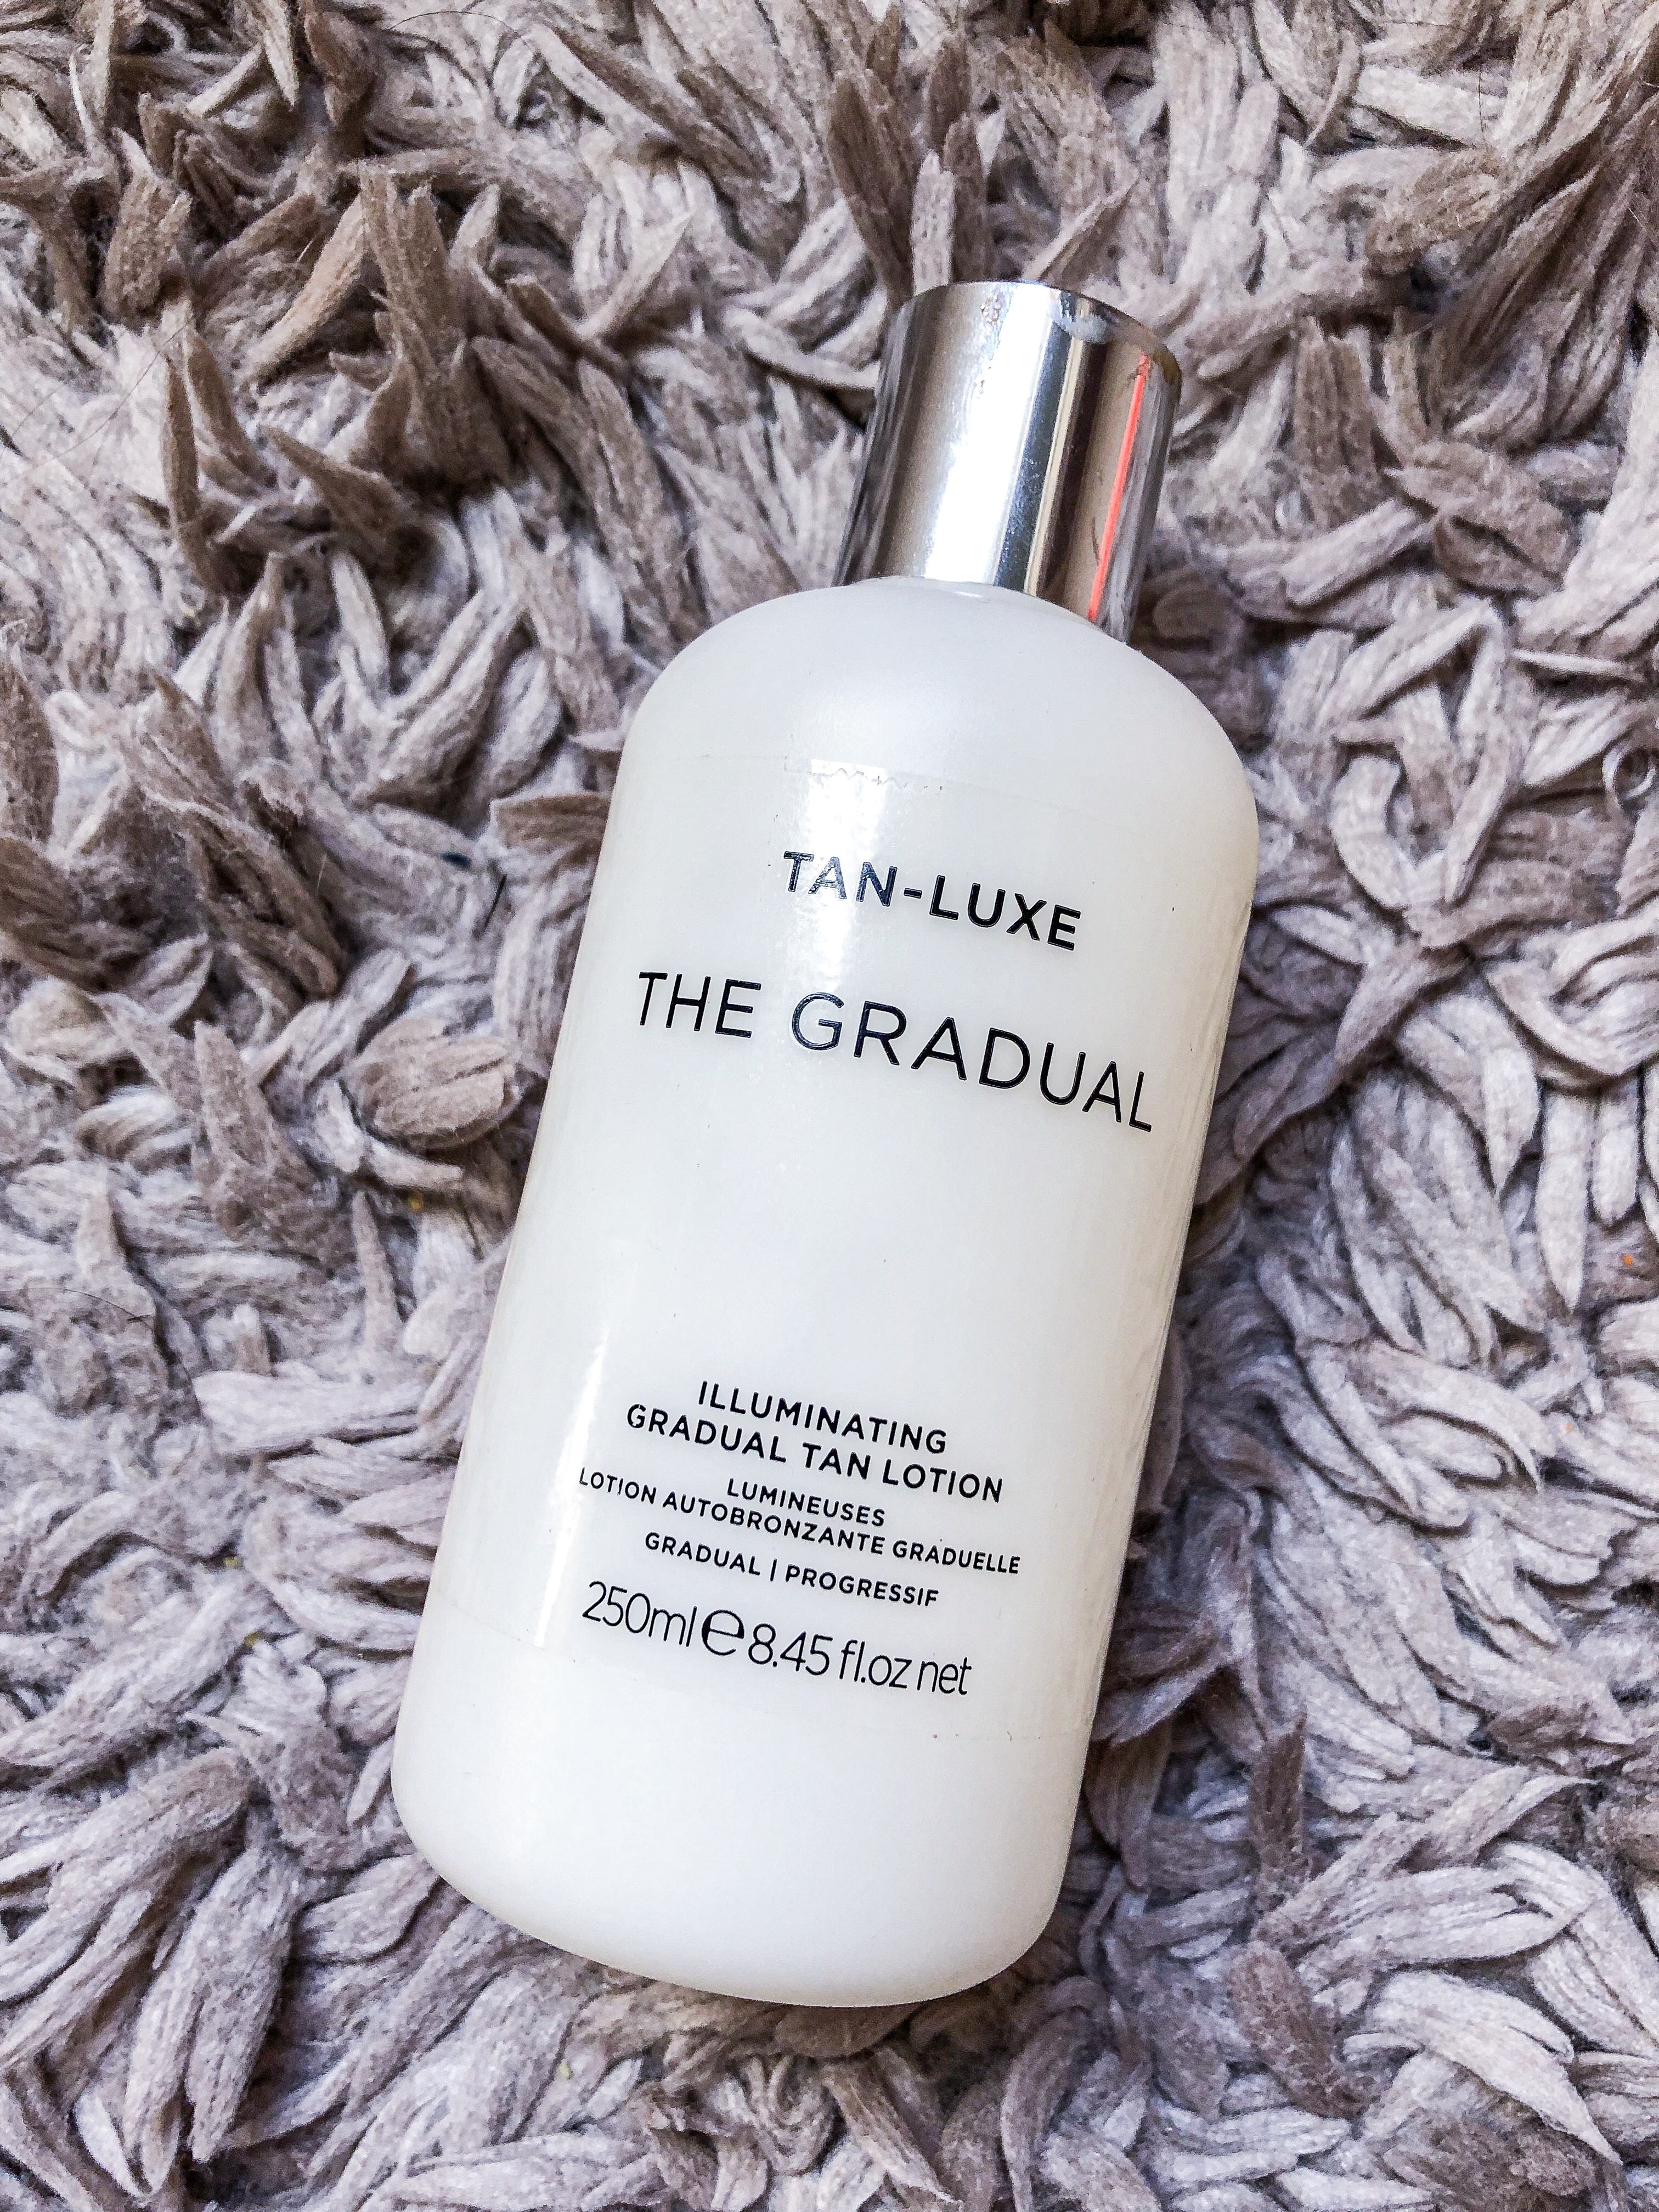
The first product I’d ever tried from this brand was The Gradual, an illuminating body lotion. It is super lightweight and smells so good. Never, ever has that fake tan smell. It really does give your skin a very natural, healthy glow. It is something that you can use periodically, or as your daily moisturizer. I like to use this about 3-4 days after I apply tanner, usually every day until I reapply my tanner. A little bit of this goes a long way. It’s a bit pricey for what it does, but in the winter I used it almost daily and never had that smell you get from other gradual tanners. You definitely need to use this sparingly on your knees, elbows, ankles, hands, and feet. It can and will get a little weird in those areas.

Tan-Luxe The Body

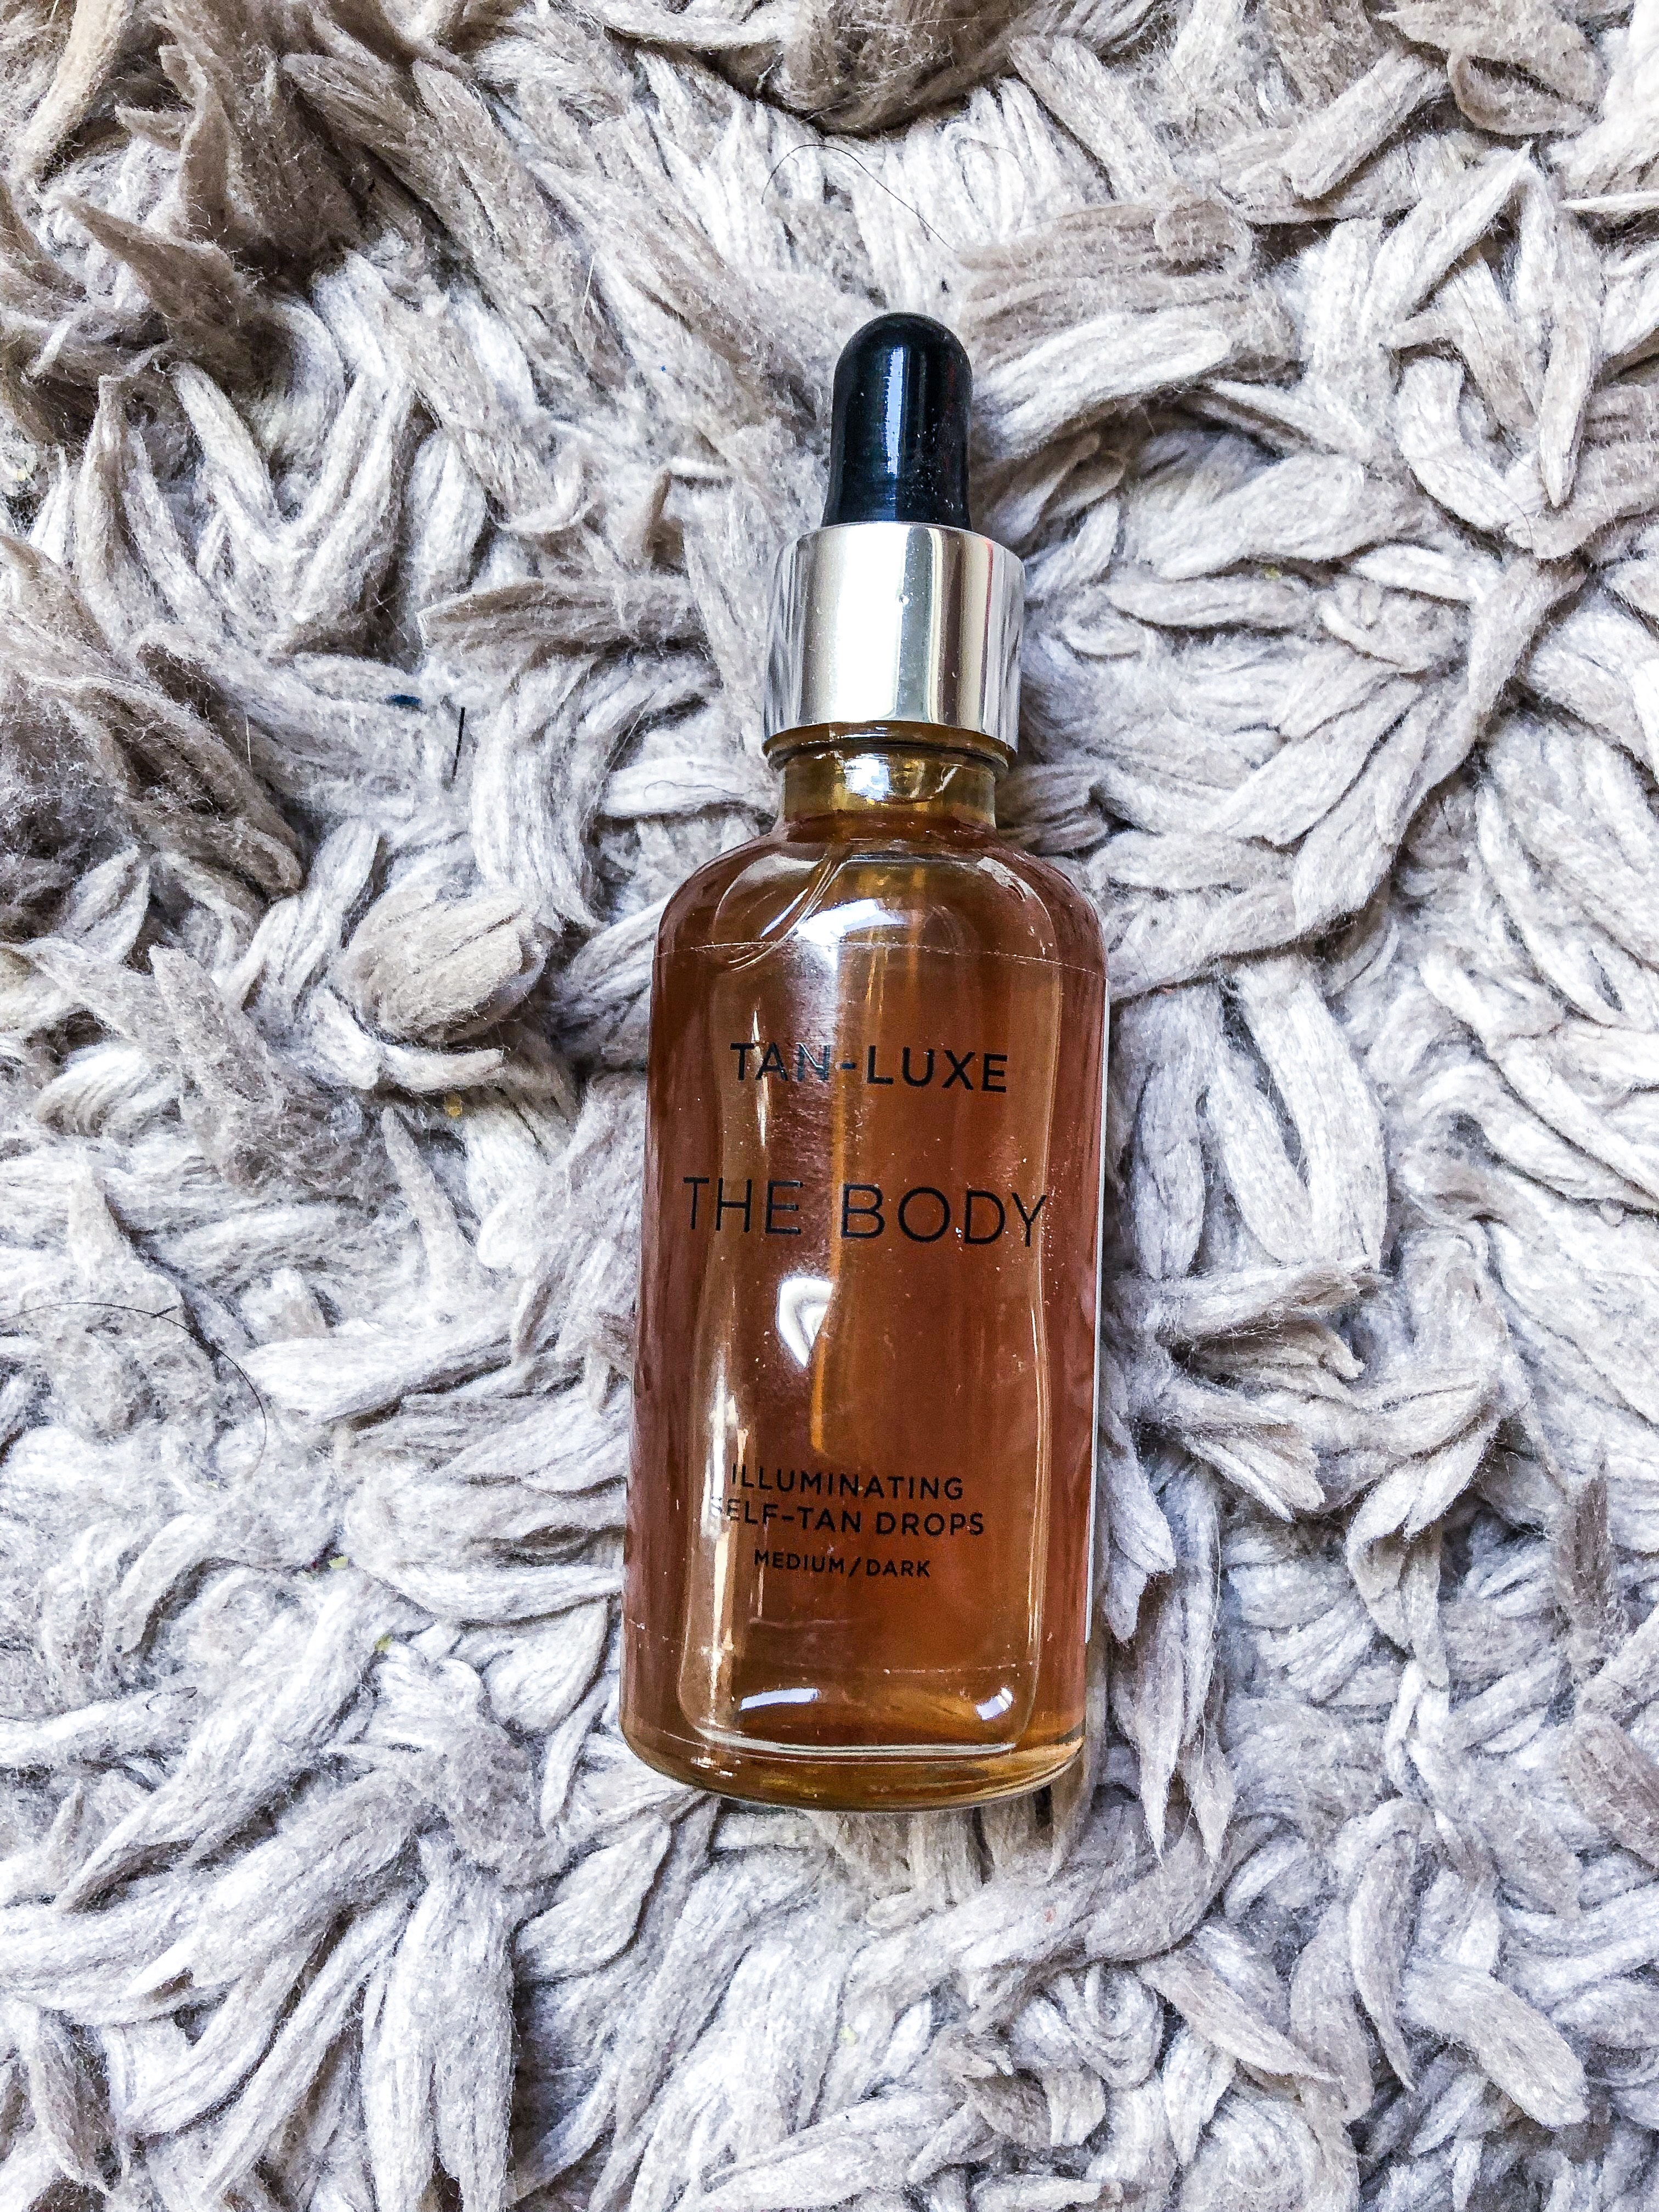
Another product I’m loving from this brand it their The Body drops, that you mix into the moisturizer of your choice. You can mix as much as you want into whatever body lotion you are already using and it will give you a beautiful, natural glow. It definitely will not get you as dark as a foam or mousse that you apply and rinse off, but it does give you a decent amount of color. I really like to use these when my skin is feeling extra dry!

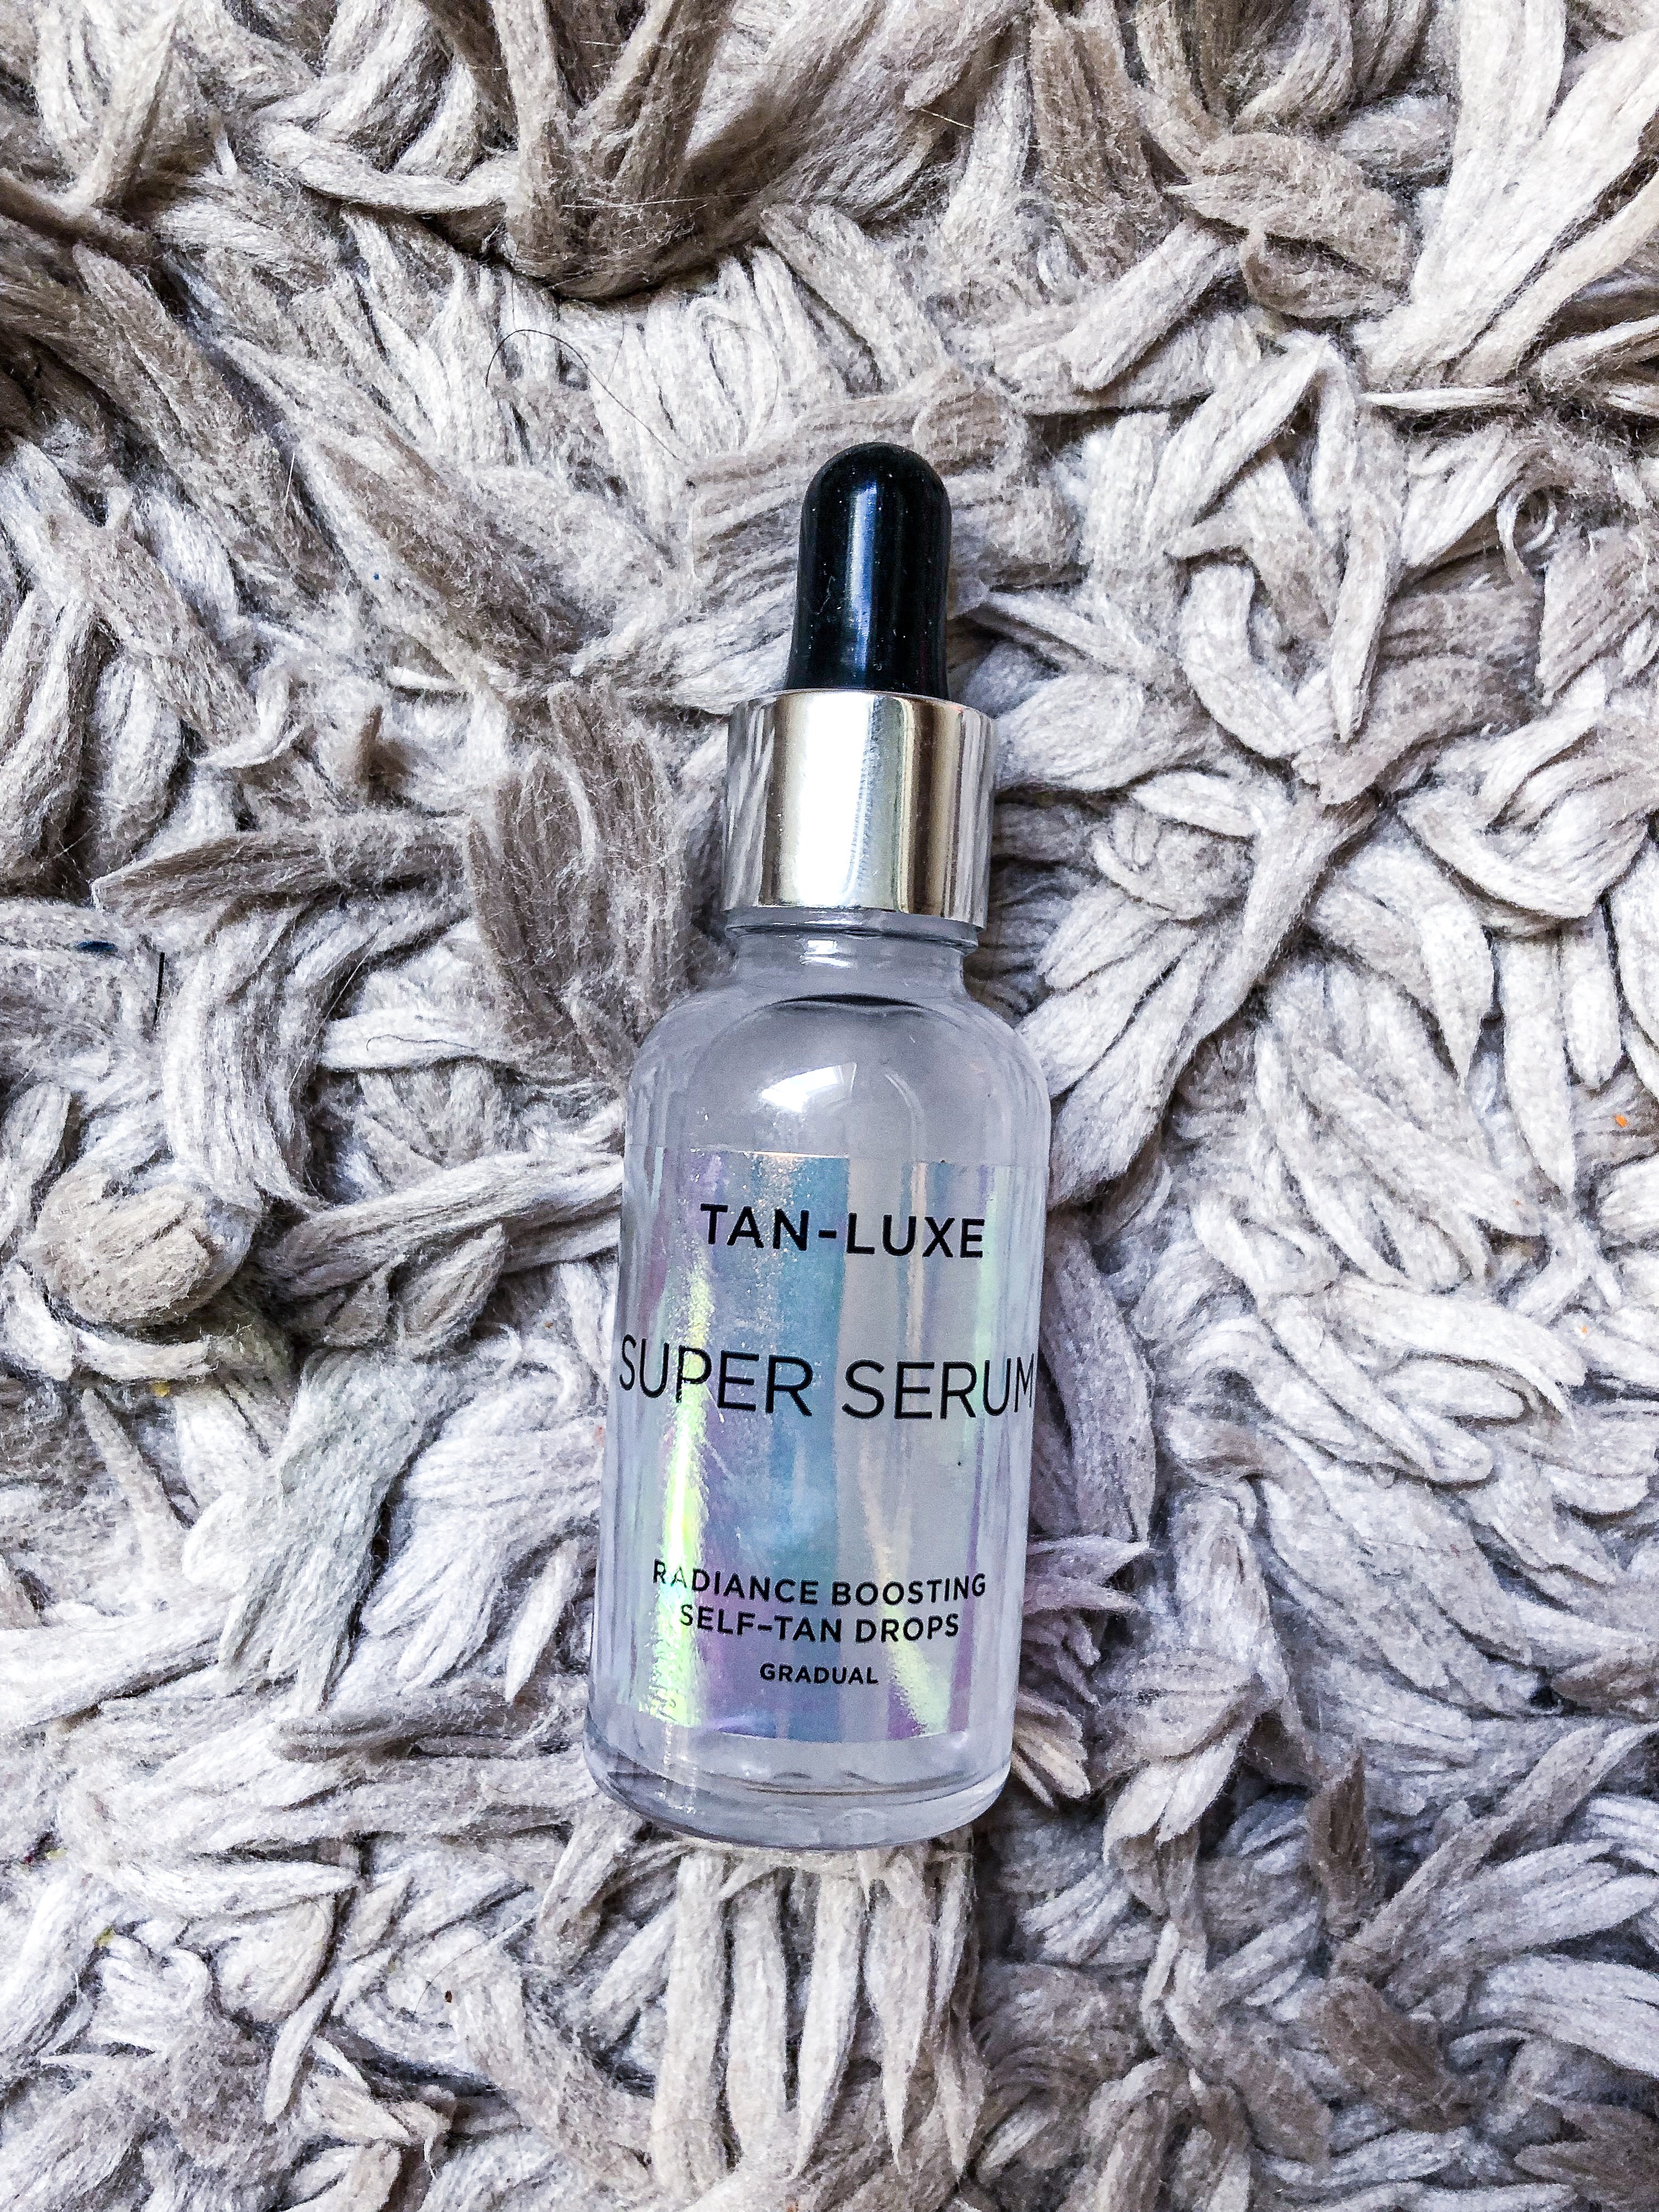
When I purchased mine it came in a set with Super Serum facial drops. The only place I’ve been able to find them is in this set from HSN. Its actually a better way to buy the two of them because you’re getting both of them for less than the price of just The Body. I use the Super Serum drops every morning in my AM skincare routine and they do give my face a slight amount of color. Of course I wash my face and exfoliate, so the color never gets as dark as the mousses that I apply to my body, but I do think that this works. It also has a lot of really great, hydrating ingredients, to help your skin to look more plump and healthy.

In the past, Iโ€™ve used the Jergenโ€™s Natural Glow moisturizer and it does give a really nice natural glow. So if youโ€™re just beginning to enter the world of self-tanners, it may be a great place to start. I never had any issues with a streaking, splotchiness, or any weird spots, but it definitely starts to develop that fake tan smell after a few days.

I plan to do another post once I’ve tried out some more tanners and let you guys know what works for me and what doesn’t.

Iโ€™m so interested to know if youโ€™re using the same products. If youโ€™re not what are you using and loving? Do you have any tips or tricks that you use? Let’s Chat!

Dry Shampoo

A peek at my current dry shampoo collection and my thoughts on each one!

This post may contain affiliate links.

If you’ve been here a while, you know that I have dry skin. My scalp is the same way… So I can go a solid week without washing my hair. That doesn’t mean a week with no dry shampoo, though. I usually need dry shampoo by the third day after washing. I use it for more than just oil absorption though. I add it to my roots for volume as well. Not to mention, I’m a mom of two wild little boys, so the amount of time I have to wash and dry my hair… is limited.

When I’m looking for a dry shampoo, I’m looking at several aspects. First, does it actually work? If it does the job I’m looking for then I look for a few other things. Does it leave a white cast? Does it smell good? Does it make my hair feel gross, or does it actually make it feel cleaner?

As with everything… This is a personal preference. What works for me might not work for you! And that’s okay! These are my opinions and you are entitled to yours.

Here is my current collection of dry shampoos, I might have a problem. Maybe not.

First up, this Klorane dry shampoo with oat milk. Overall, of every single dry shampoo I’ve tried, this is probably my absolute favorite. It has almost no scent, maybe a slightly clean scent, but no heavy perfumes. Its a white-ish powder, but hardly leaves a white cast in my hair. They actually sell a version for darker hair as well. It truly does absorb all of the oils from my scalp. My hair truly feels clean when I’ve used this. It’s a little bit pricey, and it comes in a smaller size can than most, but I believe its worth it.

This Klorane is the same it just isn’t in an aerosol can. Which I like because its better for the environment and just in general. It has the same qualities as the aerosol can. You just squeeze the bottle and it puffs out. I can’t say enough good things about this dry shampoo. Unfortunately this style of bottle does not come in a darker hair version.

This Drybar Detox Whipped Dry Shampoo Foam is definitely an interesting one. I personally love it. It smells amazing (like everything from Drybar), leaves no white cast at all (because its a foam and you rub it right into your roots) and I think it gives my hair tons of volume. However, if you use too much, this can get out of hand and make your hair feel cakey and gross. A little bit goes A LONG WAY. If you have really greasy hair, I would absolutely pass on this one. If you’ve got dry hair, you’ll probably like this.

My best friend has much more oily skin than I do. At first she liked this, but after a few uses, she realized that she didn’t love it as much as she thought. She felt as though it made her hair look greasier than it was to begin with. All a matter of your skin type and preference. If your thinking about this one, I’d probably try a smaller size. If you want it for the amazing scent, I’d go with the traditional Drybar dry shampoo. It works really well too!

This Amika Perk Up dry shampoo is a really good basic dry shampoo! It doesnโ€™t leave a terrible white cast. It has a nice scent thatโ€™s not too over powering. One thing I like about Amika is that you can get find a lot of package deals on their website. Not to mention the super fun packaging!

Dove Dry shampoo is a super affordable dry shampoo. It does the job, but I feel like it leaves my hair feeling a little bit chalky. It doesnโ€™t seem to absorb as well into my hair as the others. I have also noticed it definitely leaves a white cast. It smells really good though, and this sample size I have is perfect for on the go. Itโ€™s not my favorite out there but it works in a pinch.

This Living Proof PHD Dry shampoo gets a lot of hype. And for good reason! It really is as good as people say it is. I love how it makes my hair feel so clean! However, it does leave a white cast. I don’t even have dark brown hair. I have to rub it in pretty well. To me, that’s not an issue because the dry shampoo works so well for me. It has a really light, clean smell. The only thing I would complain about is the white cast.

Oribe… Oribe is an extremely pricey brand if you ask me. It’s the most expensive product I’m talking about today. Do I like this dry shampoo? I loved it. Do I love the price? Absolutely not. I’ve seen it ranging in the $43-$46 range. I think that that price is absurd. Especially when there are brands out there that are literally a fraction of the price and do the same thing.

Don’t misread what I’m saying. I REALLY liked this dry shampoo! Like so much that I kind of want to buy another… But I cannot swallow the pill of spending that kind of money. I got it in my FabFitFun box, and basically paid for the dry shampoo and the rest of the box was free. If you have the money and are okay with spending it. I highly recommend this product. But if you’re a saver.. or on a budget… I’d say skip it.

It doesn’t leave a white cast at all. It really does make my hair feel clean. I’m actually really sad that I used it all up. But I did use it sparingly, so it lasted me a long time.

This No Drought from Lush is amazing. It smells so good and it seems to replenish itself when I’m not looking. Just kidding. But I’ve had this since October and used it many times, and it doesn’t even look like it. It’s a loose powder, so its a little bit different than your standard dry shampoo, but it works really well. I am a huge fan of Lush products, because they don’t have any bad ingredients and are all natural. On top of that, they smell SO GOOD!

There are a few others that I’ve tried and really like, but don’t currently have in my bathroom.. because, well, I clearly don’t need them.

A staple dry shampoo is Batiste. Its all around a great workhorse of a dry shampoo. It does leave a white cast, but they do have a dark hair version if you have issues with the white powder. You can buy a small, medium, or large of the original. They also make a ton of fragrances, although some of them are a bit too strong for me. So there is a ton of variety when it comes to this affordable brand. Batiste Dry Shampoo – $9

Another great affordable option is EVA NYC. This is a great basic dry shampoo and it does a great job. I honestly don’t remember what it smells like, because I haven’t used it in a while, but that tells me that it wasn’t a strong smell. EVA NYC Freshen Up Dry Shampoo – $12

One last affordable brand is Hask. I think I went through 7 different bottles of this. I honestly didn’t have a preference for one over the other, I really liked all of the different types that I tried. Its a great affordable option! HASK Biotin Thickening Dry Shampoo – $8

Dry Conditioners

While we are talking about dry shampoos, I don’t want to neglect the ends of my hair. I heat style, probably more than I should… depending on the week and what I’ve got going on. I usually use my blow drying brush the day I wash my hair and then two or three days later I usually use my wand to curl it for the remainder of the time until the next wash. I might straighten it if I want it straight for another day. I might also add a few curls to my previously curled hair if I feel like I need it.

I know that heat styling is not great for your hair, so I thought I’d try some dry conditioners. I’ve used both the Drybar and Amika shown below and really like them both. I just mist them lightly on the ends of my hair on the fourth or fifth day after washing. Both of them give my hair a great smell and leave it feeling soft, but not greasy. These products would probably really benefit someone with much drier, courser hair as well.

Some Tips…

Less is more. You can always add more dry shampoo but itโ€™s pretty hard to take it away.

Put it in your hair before bed. I always put dry shampoo in at night. Sleeping helps it to absorb into my hair and if there is an issue with a white cast, itโ€™s mostly rubbed in by morning.

Train your hair. So often people say I canโ€™t use dry shampoo my hair is too greasy. Your scalp produces oil when it needs it. By washing your hair every single day with shampoo you are stripping the oils and telling your scalp to produce more. I used to have super oily skin, and scalp. (Now Iโ€™m just a walking Sahara desert. Thanks pregnancies.) It took me some time to use dry shampoo successfully. I had to teach my hair. I started out slow and eventually, when I was an oily gal, I was able to go a solid 3 days without washing.

Rub it in. You donโ€™t just spray dry shampoo into your head and expect it to magically degrease your scalp. You have to spray it onto your roots, let it sit, and rub it in with your fingertips. Doing this also allows you to build a little bit of volume.

Use it for volume. I said earlier that I donโ€™t use it just to absorb oils. I use it to help my super fine hair look a little thicker.

Dry shampoo is all about trial and error. You have to find what works for your hair. I tried to find, and link, trial and sample sizes for you, so if youโ€™re interested in one but donโ€™t want to commit to a full size bottle, try out the mini!

I’d love to hear about your favorite dry shampoos! Are there any I’m really missing out on?

XOXO

Daily 5 – 6/19/19

Happy Wednesday! โค๏ธโค๏ธ

*This post may contain affiliate links.

I think itโ€™s the colors, but this cardigan is just calling me! Itโ€™s so pretty and lightweight. It comes in two colors and is $24.99.

Summer Cardigan

Iโ€™m in love with Tory Burch Miller sandals but I refuse to pay that much. If youโ€™re anything like me, you want a pair but will continue to just admire those that have them. I found a pretty affordable look alike pair! These are only $26.99 and I think theyโ€™ll go fast! They come in a variety of colors too!

Cute Heart Slip-on Sandals

I just got and am obsessed with these Old Navy Boyfriend shorts. The two toned look is so fun. The length is PERFECTION! If youโ€™re between sizes Iโ€™d go down. Otherwise stick to your normal size. Theyโ€™re on sale for $15!

Mid-rise Cuffed Boyfriend Shorts

I saw this on another bloggerโ€™s little guy and I had to get it for W. Itโ€™s so sweet and he absolutely LOVES to eat watermelon so I knew he needed it.

Watermelon One Piece

These NYX lip pencils are a great basic and already affordable. But theyโ€™re on sale at Ulta right now! Stock up!

NYX Slim Lip Pencil

I hope youโ€™re all having a fantastic Wednesday! XOXO

Everyday Makeup Routine

Here is a look at my current everyday makeup routine!

Grab a snack, you’re going to be here a while.

I don’t wear makeup because I feel like I need to. I don’t wear makeup to please anyone. I wear makeup simply because I enjoy it. It’s my creative outlet. I love to see my face transform from it’s normal self to something similar but slightly better. It’s just something that I really enjoy. When I get ready in the morning, that’s my “me time” and I cherish it. It doesn’t happen as often during summer, because sometimes I trade in that time for a few extra minutes in bed. But lately, I’ve been getting up before the boys, when my husband leaves for work and just getting ready for the day. I feel like getting myself ready and put together helps me with productivity. Maybe I’m imagining that, but let me keep thinking that way.

A little before and after

To some people this probably seems like a lot of products. And nobody said it wasn’t. It’s just what I like to wear.

A little overview of most of the products mentioned

I always do my eye makeup first. That way, if I decide I want to do a Smokey Eye or something a little bit heavier, I don’t ruin my foundation with any fall out.

After I’ve prepped my skin with moisturizers, I start by applying a Mac Paint Pot to my eyelids. I’ve used both Painterly and Soft Ochre and they’re both great. Painterly has a more pink undertone and Soft Ochre is more yellow. I prefer Painterly, just because it works well for me whether or not I’m self tanned. It literally cancels out everything on my lids, and creates a perfect canvas for eyeshadow. It also makes my eye makeup last ALL day long. A normal day consists of me wearing my makeup for around 12 hours, and it looks the same when I wash it off as it did when I started.

MAC Paint Pot – Painterly

I have an insane amount of eyeshadow. Palettes, singles, quads, like I’m talking an unhealthy amount that I will never completely use up. So my eyeshadow varies, honestly weekly… but I’ve been using the Tartlette In Bloom a lot lately! It’s got a great mix of mattes and shimmers and a great shade range. It’s also one of my favorites, because my husband bought it for me as a gift.

Depending on the look I’m going for, and what I’m planning to wear, I take either Jetsetter, Smartypants, or Sweetheart, or a combo of them and blend it into my crease. Then, I take Funny Girl and Charmer and apply them to the inner part of my lid. Next, I add Rocker, Firecracker, and/or Rebel and blend it onto the outer part of my lid. If I want something a little bit darker, I’ll add Smokeshow, Activist, or Leader to my lash line and outer corner and blend them together. I take the darker colors along my lower lash line and buff them out once I’ve got my concealer applied and set. Lastly, I’ll take some of Charmer and lightly dust it under my brows. (I did my best to get the shade names to show up, but the lighting just didn’t want to cooperate. So I grabbed a photo where you can see the color names.)

Once my eyes are done, I generally apply my primer to my skin. I’ve been loving so many primers lately, but the combo that’s really my go-to is one pump of Two Faced HangoveRX and one pump of Bare Minerals Prime Time. (I know, it starting to sound like a complicated Starbucks order over here…) I have dry skin so even though I’ve already applied a significant amount of moisturizers it never hurts to add a bit more with a primer. The Prime Time gives my skin a super smooth texture and helps the foundation to lay nicely on the skin.

My go-to “foundation”, for years, has been the It Cosmetics CC Cream. I have gone through multiple tubes of this. In fact, it’s the only foundation I’ve ever purchased more than once. It gives me the perfect amount of coverage. It’s moisturizing, but doesn’t make my skin overly shiny. It has SPF 50! Which is a major bonus! And another important thing, it lasts all day! During the winter months, I prefer the illuminating version, and I wear the shade light. During the summer months I prefer the original version and wear the shade medium. I apply with a foundation brush or a BeautyBlender, both work great for me. It just depends on the day and how I’m feeling!

Once my foundation is on I apply the smallest, like seriously the smallest, amount of Tarte Shape Tape under my eyes, on the bridge of my nose, and a couple of dots above my brows and blend them in. This concealer literally covers every single imperfection. However, you CAN use too much. You do not need much of this at all! One tube will last you a while!

After I’ve applied my concealer I have to set it with something. I’ve got a few different products I like but for a quick and easy look I grab my Anastasia Beverly Hills Contour Palette. I mix the three light shades and just brush it wherever I put concealer. (Don’t judge me. This palette is beat up. But that’s proof that I really do use it a lot!)

I follow that with my setting powder. I do have dry skin, but I find that I need to set my makeup with powder no matter what. I’ve been using and loving the It Cosmetics Bye Bye Pores setting powder. I’ve got both the loose and the pressed and love them both! It sets the foundation beautifully and does not leave a white cast on my skin. (The silver lid is a slightly tinted version that my mom had given to me. I use that when Iโ€™m very tan. I havenโ€™t been able to find it anywhere, so Iโ€™m thinking it was a limited edition.)

Once I’ve set everything I go in and finish my eye look (except mascara, that’s last) I just grab some of the darker colors and blend them on my lower lash line. I take the lightest color and tap it into my inner corner. If I’m feeling like I need a little bit more brightening, I’ll add some of my highlighter as well.

Next, I take my bronzer and apply like a 3 on my face. (Around the top of my forehead, in the contours of my cheeks, and around my jawline) No rhyme or reason, I just apply it and blend it until I’m happy with it.

After bronzer, I apply my highlight to the high points of my face. I lightly dust it on my cheekbones, nose, forehead, chin, and the top of my lip.

I follow my highlighter with my blush. I like to do highlighter first and then blush because I feel like the blush helps to blend in the highlighter and make it look a bit more natural and less flashy.

Iโ€™ve been using this Physicians Formula Palette, which unfortunately was limited edition. However, you can find most of the products, or very similar ones, sold individually. (Iโ€™m not showing a picture of the inside of this one, because one of the highlighters broke and itโ€™s a disaster.) Iโ€™ll link the individual items below the photo.

If you haven’t already heard about this.. You’re probably not living in this century. This product is raved about over and over. Like to the point where you’re probably sick and tired of hearing people talk about it. But there’s a reason. It is so smooth and blends so beautifully on your skin. Not only is it beautiful, but it smells like Heaven. If Heaven has a scent… this is it. It makes me just want to sit on the sand and sip some kind of tropical drink. It smells amazing. This set actually came with a bottle of the fragrance. It lasted me like a month and was gone. I wish I could buy it by the gallon!

Physicians Formula Butter Bronzer
Physicians Formula Butter Blush
Physicians Formula Butter Highlighter

I donโ€™t have any one specific brow product that I love more than the others. Iโ€™ve been using Wunderbrow and itโ€™s great, but itโ€™s not my favorite application method. (I’m lazy and this takes some work.) It really truly does last and is extremely waterproof. It just takes a little bit more time to apply. I generally find that pencils work really well for me. I knew when I was doing my makeup for this particular day that my brows needed to be waterproof and long lasting, so I went with the Wunderbrow.

Wunderbrow

Once my face is done I have to spray with some kind of setting spray. There are A TON of great ones out there but my go to is MAC Fix+. It helps to melt everything together and get rid of any powdery look I may have. I always do this before mascara because I literally drench my face in this stuff and if Iโ€™d already applied mascara it would just be a disaster.

This is also really great for a mid-day refresh too. I love how hydrating it is!

MAC Fix+

The last thing I do is apply my mascara. I actually recently got this sample of lash primer from Lancรดme and guys… itโ€™s amazing. It has changed my life. I donโ€™t know if Iโ€™ll ever be able to go without it! I already swore by the It Cosmetics Superhero, but this just amps that up another 10 levels. I’ve already got a backup in my drawer, but I’m using every last drop of the sample first.

Lancรดme Cils Booster XL
It Cosmetics Superhero Mascara

For lips, I literally just grab anything. In the picture above, Iโ€™m wearing NYX Thalia. Itโ€™s a super old lipstick and the only place I could find it was from the NYX website. HERE Honestly though, lips are such a personal preference. Lip colors also vary so much from person to person. What looks like one color on me will look completely different on others.

Like I said, this routine might not be for everyone. I donโ€™t do this for anyone but myself. I always love to hear what other people are enjoying using, so I thought Iโ€™d share my current favorites.

There are SO many other products that I love and use. But these are just what Iโ€™m using the most regularly, at this time. As my routine changes, I’ll update you guys!

What are your favorite makeup products? Iโ€™d love to know!